I have recently bought a Brilliant Smart WiFi Ceiling Fan Controller for a bedroom ceiling fan in our house. This is a Tuya device but I wanted to avoid signing up to the Tuya cloud service to operate my ceiling fan under all circumstances. In this article I just wanted to share a few learnings and observations.
Like many other devices the controller uses the ESP to communicate with the world and a separate MCU to control the fan and lights.
Unfortunately – as far as I know – ESPHome does not yet fully support all use-cases to control an MCU, so I decided to give Tasmota a chance which has recently added and improved support to control an MCU. Thanks to some amazing pre-work in the HA community forum I did not have to start at zero. Still, the learning curve is pretty steep if you have never used Tasmota before and the concept is quite different to ESPHome which has become my number one choice when adopting ESP devices into my home automation system.
Prerequisites
Tasmota firmware from development branch
The old Tasmota 6.7.1 did not yet support all the features required to use this fan controller, so I had to compile my own firmware. I followed the instructions in the Tasmota wiki, used VS Studio and were able to compile a 7.0.0.4 firmware within an hour.
In the meantime a new Tasmota major release has been published, and I have flashed a standard image, using version 7.1.1 now.
Tuya-Convert
I have adopted plenty of Tuya devices using Tuya-Convert. I am now using a dedicated Raspberry Pi 3 running Raspbian 10. It is connected via Ethernet to my network so that I keep full remote control while Tuya-Convert uses the WiFi adapter.
I used Tuya-Convert version 2.2.0 with a manual patch of one file that was required to convert some other devices.
Configuration
Tasmota
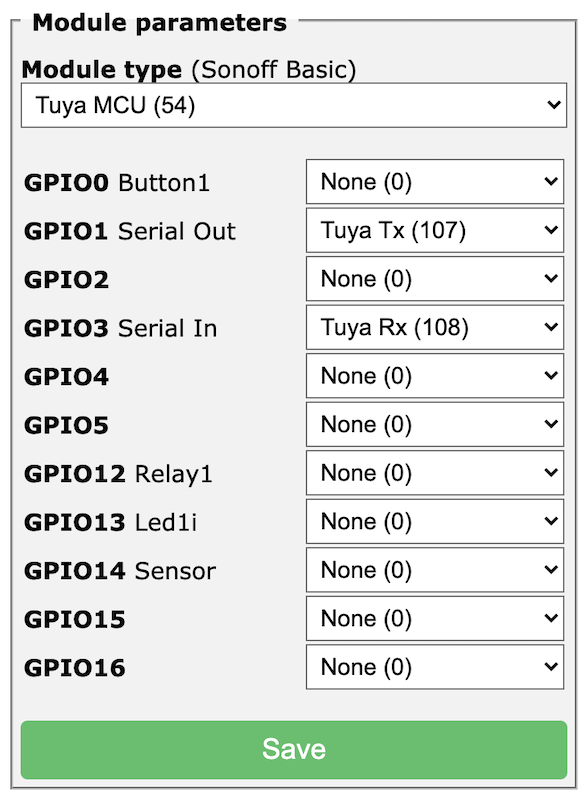
There are 3 items that need to be mapped to Tasmota controls. The following configuration worked for me and correctly linked light and dimmer, and also automatically generated a light entity and fan power switch entity using auto-discovery.
# Configure Power1 (fnId=11) as Fan power (dpId=1)
TuyaMCU 11,1
# Configure Power2 (fnId=12) as Light (dpId=9)
TuyaMCU 12,9
# Configure Dimmer (fnId=21) as Light Dimmer (dpId=10)
TuyaMCU 21,10
I connected an LED light to my fan which comes with its own LED driver. The driver itself has a control input which is not compatible with the fan controller. Instead the fan controller dims by changing the voltage which would make the LED to blink. To avoid that I just limited the dimmer range.
# Dimmer is not working with my LED driver. Limit range.
DimmerRange 100,100
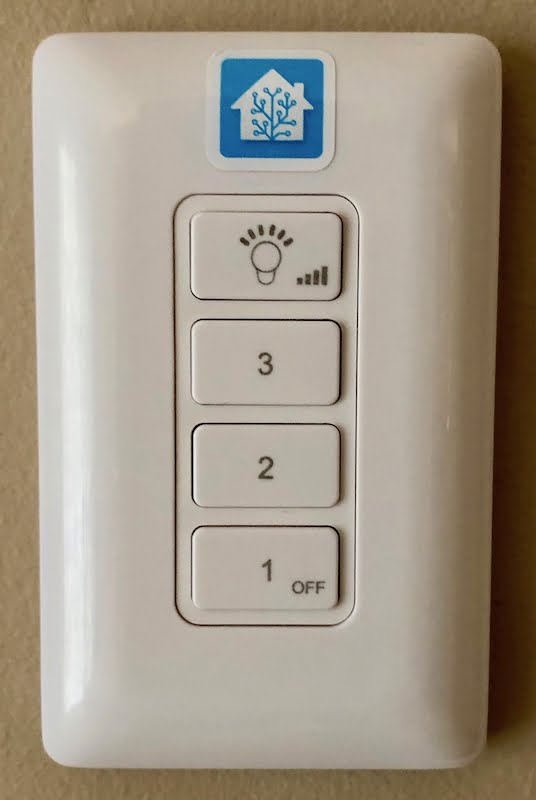
The following rule listens to changes coming from the MCU and initiated by using the remote control. Each code corresponds to a fan speed, and the action then publishes the current speed value via MQTT so that Home Asssistant can update the fan entity. I decided to go with non-retained messages in this case and instead query the speed on Home Assistant start-up.
# Rule: Publish speed to MQTT when using the remote control.
Rule1 on TuyaReceived#Data=55AA03070005030400010016 DO Publish esp_fan_bedroom/stat/RESULT {"Speed":1} endon on TuyaReceived#Data=55AA03070005030400010117 DO Publish esp_fan_bedroom/stat/RESULT {"Speed":2} endon on TuyaReceived#Data=55AA03070005030400010218 DO Publish esp_fan_bedroom/stat/RESULT {"Speed":3} endon
Rule1 ON
The second rule listens to incoming triggers initiated from changing the speed of the Home Assistant fan entity. The payload in the MQTT message is something like speed=1 and the action taken is to turn on the fan (Power1 1) and then send the speed value. For example, TuyaSend4 3,0 sends an enum value of 0 (speed 1/low) to dpId 3.
# Rule: Set speed when commands arrive from HA via MQTT.
Rule2 on Event#speed=1 DO Backlog Power1 1; TuyaSend4 3,0 endon on Event#speed=2 DO Backlog Power1 1; TuyaSend4 3,1 endon on Event#speed=3 DO Backlog Power1 1; TuyaSend4 3,2 endon
Rule2 ON
I configured auto-discovery which generates a status sensor, a light switch and a power switch for the fan. This also swaps the MQTT command and topic around.
# Set HA auto discover.
SetOption19 1
Home Assistant
Auto-discovery
Assuming that you have MQTT already set up in general, the new device should automatically appear in Home Assistant, and you should see 3 entities:
- Light
- Fan power
- Status
Fan
The fan configuration is a bit more complex, so let’s have a look in detail:
- Availability: The Tasmota device sends telemetry data on
[device]/tele/LWT, and we can subscribe to those updates. - State: In the above configuration we have tied the fan power to
POWER1and have to subscribe to the correspondingstatmessages and send via thecmndtopic. - Speed: This is a bit trickier. To change the speed, a payload like
speed=2needs to be sent to the[device]/cmnd/Eventtopic. This is then picked up by Rule2 in the Tasmota configuration. When the fan speed changes – as defined in Rule1 – the device confirms the speed as JSON payload which can be extracted and transformed into a payload likespeed=2that the fan definition below understands.
fan:
  - platform: mqtt
    name: "Fan Bedroom"
    availability_topic: "esp_fan_bedroom/tele/LWT"
    payload_available: "Online"
    payload_not_available: "Offline"
    state_topic: "esp_fan_bedroom/stat/POWER1"
    command_topic: "esp_fan_bedroom/cmnd/POWER1"
    payload_on: "ON"
    payload_off: "OFF"
    speed_state_topic: "esp_fan_bedroom/stat/RESULT"
    speed_value_template: "{% if value_json is defined and value_json.Speed is defined %}speed={{ value_json.Speed }}{% endif %}"
    speed_command_topic: "esp_fan_bedroom/cmnd/Event"
    payload_low_speed: "speed=1"
    payload_medium_speed: "speed=2"
    payload_high_speed: "speed=3"
    qos: 1
    speeds:
      - low
      - medium
      - high
The following automation is required to retrieve the latest state of the fan – power and speed. It executes two commands with empty payloads which should trigger the device to send the current state as a result.
automation:
  - alias: "Update fan power state on start-up"
    trigger:
      platform: homeassistant
      event: start
    action:
      - service: mqtt.publish
        data:
          topic: "esp_fan_bedroom/cmnd/POWER1"
          payload: ""
      - service: mqtt.publish
        data:
          topic: "esp_fan_bedroom/cmnd/Event/speed"
          payload: ""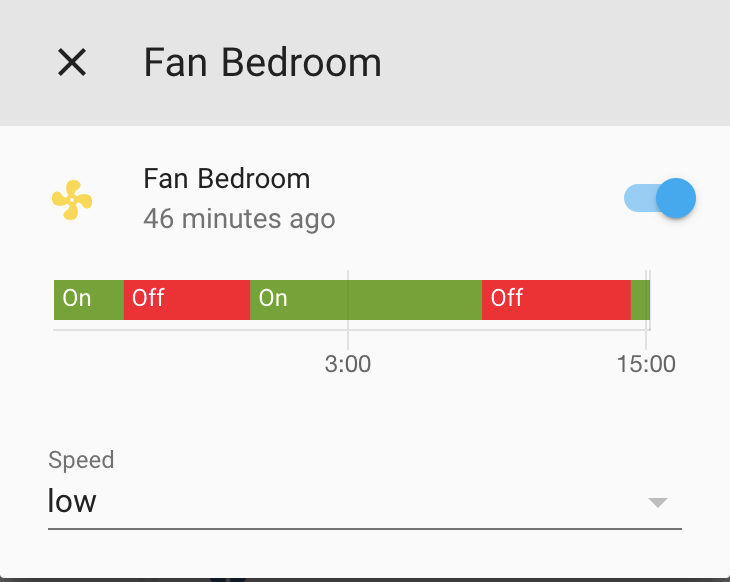
Device Monitoring
After having deployed many ESP based devices already, I found it quite useful to keep some information about the device itself in HA. I have added the following sensors and script which replicated from what I normally get in ESPHome.
binary_sensor:
  - platform: mqtt
    name: "ESP Fan Bedroom Status"
    state_topic: "esp_fan_bedroom/tele/LWT"
    payload_on: 'Online'
    payload_off: 'Offline'
    device_class: connectivity

sensor:
  - platform: template
    sensors:
      # Fan Master Bedroom
      esp_fan_bedroom_ip_address:
        friendly_name: "ESP Fan Bedroom IP Address"
        value_template: "{{ state_attr('sensor.esp_fan_bedroom_status', 'IPAddress') }}"
        availability_template: "{{ is_state('binary_sensor.esp_fan_bedroom_status', 'on') }}"
      esp_fan_bedroom_rssi:
        friendly_name: "ESP Fan Bedroom RSSI"
        value_template: "{{ state_attr('sensor.esp_fan_bedroom_status', 'RSSI') }}"
        icon_template: 'mdi:wifi'
        unit_of_measurement: 'dB'
        availability_template: "{{ is_state('binary_sensor.esp_fan_bedroom_status', 'on') }}"
      esp_fan_bedroom_uptime:
        friendly_name: "ESP Fan Bedroom Uptime"
        value_template: "{{ state_attr('sensor.esp_fan_bedroom_status', 'Uptime') | regex_replace(find='T', replace='d, ', ignorecase=False) }}"
        icon_template: 'mdi:clock-start'
        availability_template: "{{ is_state('binary_sensor.esp_fan_bedroom_status', 'on') }}"
      esp_fan_bedroom_version:
        friendly_name: "ESP Fan Bedroom Version"
        value_template: "{{ state_attr('sensor.esp_fan_bedroom_status', 'Version') }}"
        icon_template: 'mdi:information'
        availability_template: "{{ is_state('binary_sensor.esp_fan_bedroom_status', 'on') }}"

script:
  esp_fan_bedroom_restart:
    alias: "ESP Fan Bedroom Restart"
    sequence:
      - service: mqtt.publish
        data:
          topic: "esp_fan_bedroom/cmnd/Restart"
          payload: "1"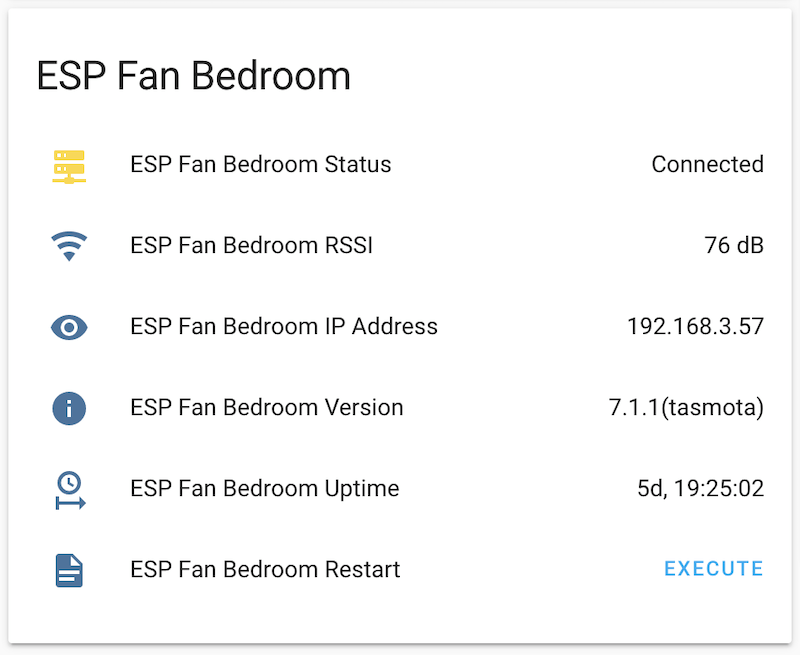
Ceiling Fan
Originally I was planning to use this fan controller with a Spyda 36″ ceiling fan in one of the kid’s bedrooms. Unfortunately it turned out that the speed control did not really work with that fan, i.e. there was no noticeable difference in fan speed when changing between the 3 speeds.
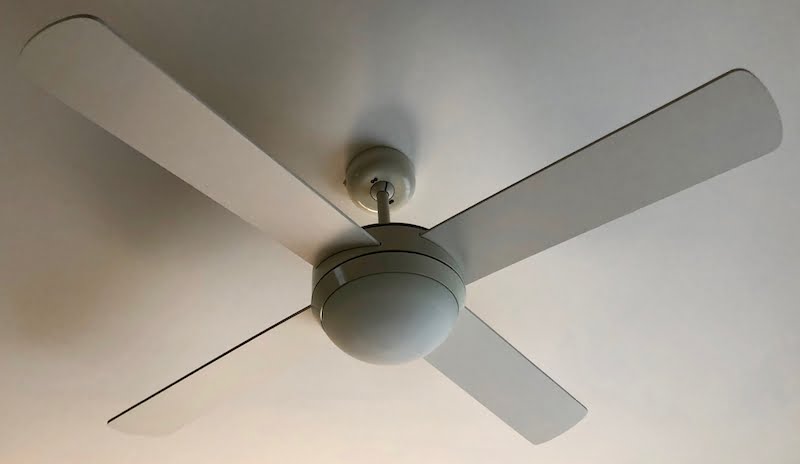
Instead I had this fan controller retrofitted onto an Lucci ceiling fan where the previous non-smart ceiling controller’s speed control was already broken. This is a better fit and the 3 speeds actually work. The built-in lamp can be turned on and off, but like the LED in the Spyda fan, the lamp in this ceiling fan does not support dimming.
Observations
- I have to admit that Tasmota is very powerful and supports many devices and sensors. However, there are also a lot of conventions and other magic going on under the hood which makes it quite hard as a beginner to get the configuration right. Luckily the Tasmota wiki is quite comprehensive, but I had to read a lot until I got my configuration right.
- A while ago I made a switch from ESPEasy to ESPHome, and one of the reasons for that step was that I preferred a framework where I can define all the sensors and pins and everything upfront in a human-readable configuration file that I can version and easily backup. With Tasmota it feels like taking a step backwards – at least in this case – where I uploaded a generic firmware to the device and then had to configure the device through its web interface. This may be less of an issue in cases where the whole device configuration is available as a template.
- Automated device discovery is great – if it works. I couldn’t really find out in which cases Tasmota exposes a relay as a switch or a light. There is an option to expose all relays as lights, but that is not what I needed for this fan controller.
- Another user in the HA community forum has taken the above configuration and slightly refined it in a way that does not require any rules in the Tasmota device itself, which makes the HA configuration a bit more complex. Please have a look at the blog entry for a comparison.
Outlook
I am now still left with a new ceiling fan without smart control. Luckily there are alternatives, and I am in the process of adopting a SRL Tech fan controller which has turned out to work very similarly like the Brilliant one. I will share a working configuration as soon as possible.
Compatibility
At the time of writing this post, I used:
- Home Assistant 0.103.4 with Python 3.7.5
- Tasmota 7.1.1
- Tuya-Convert 2.2.0 on Raspbian 10 (Buster)
Update 01 July 2021 – Tasmota firmware upgrade
I just updated this fan controller to the latest Tasmota version – 9.5.0 – and can report that the above configuration still works fine. I am now using the Home Assistant Tasmota integration and this requires version 9.2.0 at the minimum, and you need to run command SetOption19 0 in the Tasmota console for discovery. As a result new entities may be created in Home Assistant and you will need to manually remove the old ones and rename the entity IDs of the new ones.
Just make sure you follow the recommended Tasmota upgrade path, and with the fan controller – due to its limited memory you need to first install the minimal version followed by the full version in each step of the path.
Update 19 Aug 2021 – Speeds
With the migration of fan speeds to percentages in Home Assistant 2021.4, the fan controller configuration requires some updates. Compared to the example above some configuration variables have to be removed and some other added:
- Removed
speed_state_topicspeed_value_templatespeed_command_topicpayload_low_speedpayload_medium_speedpayload_high_speedspeeds
- Added
speed_range_max: In the case of this fan controller this is set to3.percentage_command_topic: Same as thespeed_command_topicbefore.
percentage_command_template: This template translates the percentage value into a speed value understood by the Tasmota rules.percentage_state_topic: Same as thespeed_state_topicbefore.percentage_value_template: This ttemplate translates the value received from the controller into a percentage value.
The resulting configuration for my fan controllers then looks as follows:
fan:
  - platform: mqtt
    name: "Fan Bedroom"
    availability_topic: "esp_fan_bedroom/tele/LWT"
    payload_available: "Online"
    payload_not_available: "Offline"
    state_topic: "esp_fan_bedroom/stat/POWER1"
    command_topic: "esp_fan_bedroom/cmnd/POWER1"
    payload_on: "ON"
    payload_off: "OFF"
    qos: 1
    speed_range_max: 3
    percentage_command_topic: "esp_fan_bedroom/cmnd/Event"
    percentage_command_template: "speed={{ (value | int) }}"
    percentage_state_topic: "esp_fan_bedroom/stat/RESULT"
    percentage_value_template: "{% if value_json is defined and value_json.Speed is defined %}{{ (value_json.Speed | int) }}{% endif %}"
It would actually be possible to simplify the templates by implementing the percentages directly in the Tasmota rules, but for now I decided to translate the 3 speeds into percentages inside the Home Assistant templates.
Update 06 Sep 2021 – Fixes
Unfortunately I realised that I copied the wrong MQTT fan configuration in my last update in August, so I fixed that in the above.
In a nutshell, with the speed_range_max setting you can essentially align the actual speeds on the device with the Home Assistant configuration and thereby circumventing the conversion to and from percentages. So, by setting this to 3 as in the example above you can send the speed value straight to the device, and in return when receiving a value you need to parse the value from the JSON provided.
Leave a Reply to Jason Cancel reply