A subfloor ventilation system is probably something that most people get installed, configured and then forget about. And in many cases that might be fine, but if you had the opportunity, wouldn’t it be better to take more control over such a system? I decided to do exactly that and control the ventilation system based on environmental sensors.
Earlier this year we have had a very wet summer and autumn – in the months from February to April we had as much rain as normally falls within a whole year in this area. A lot of this water did not know where to go and decided to dissipate through the brick walls ending up under the house. That space is not really made for that much water and humidity, partially because it is right under our timber floor.
I knew I had to improve the subfloor ventilation somehow. Of course that does not necessarily help with large amounts of liquid water under the house, but I was more looking for long term moisture control and to be better prepared for wild weather events.
Moisture Control
The key to moisture control is to first acknowledge that outside air and the air under the house can differ in temperature and humidity, and to then use the smarts of home automation to ventilate the area accordingly.
“Water vapor may be removed from indoor air by dehumidification (e.g., air conditioners or dehumidifiers) or by ventilation air when the outdoor air is dry. Ventilating air only dehumidifies the indoors when the outdoor air dew point is lower than the indoor air dew point.”
(from Moisture Control Guidance for Building Design, Construction and Maintenance)
This guidance from the EPA tells us what to really focus on when automating a ventilation system – dew points. We will come back to this after I explain the physical installation of the system.
Choosing the subfloor fan system
The subfloor area under our house can essentially be distinguished into 3 different zones, and the main area of concern is under the centre of the house where there is little to no fresh air coming from 3 sides of the house, and where I have started installing underfloor insulation which is supposed to also prevent air exchange with the house (and hopefully keeping us warm this winter). That space is about 10 metres long, 4 metres wide and 1 metre high.
I decided to buy a ducted ventilation kit with a single fan and two intakes. This particular kit promises a silent fan and comes with all sorts of accessories.
Installing the system
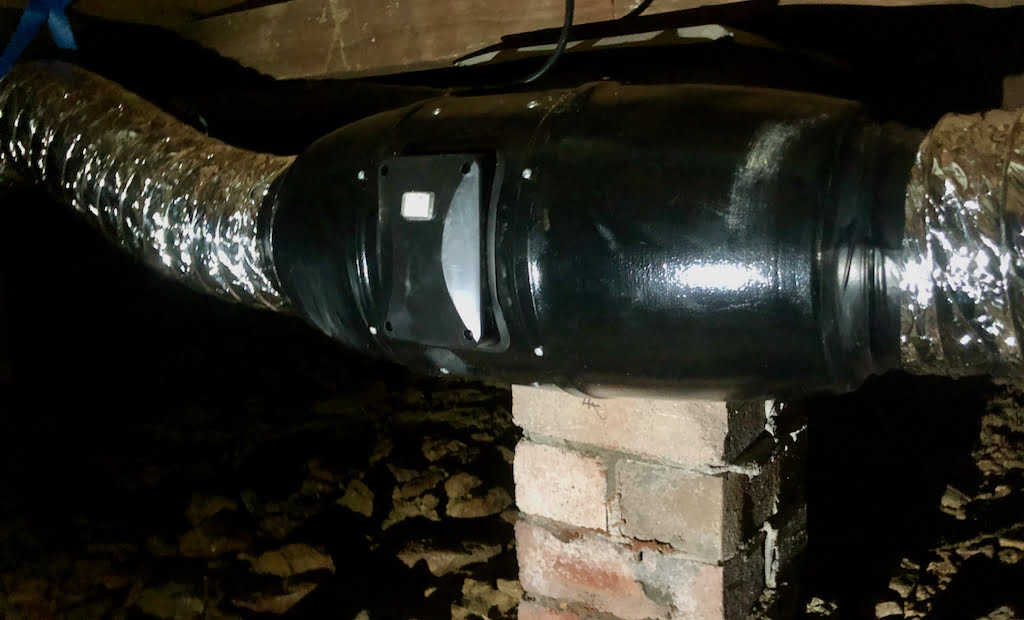
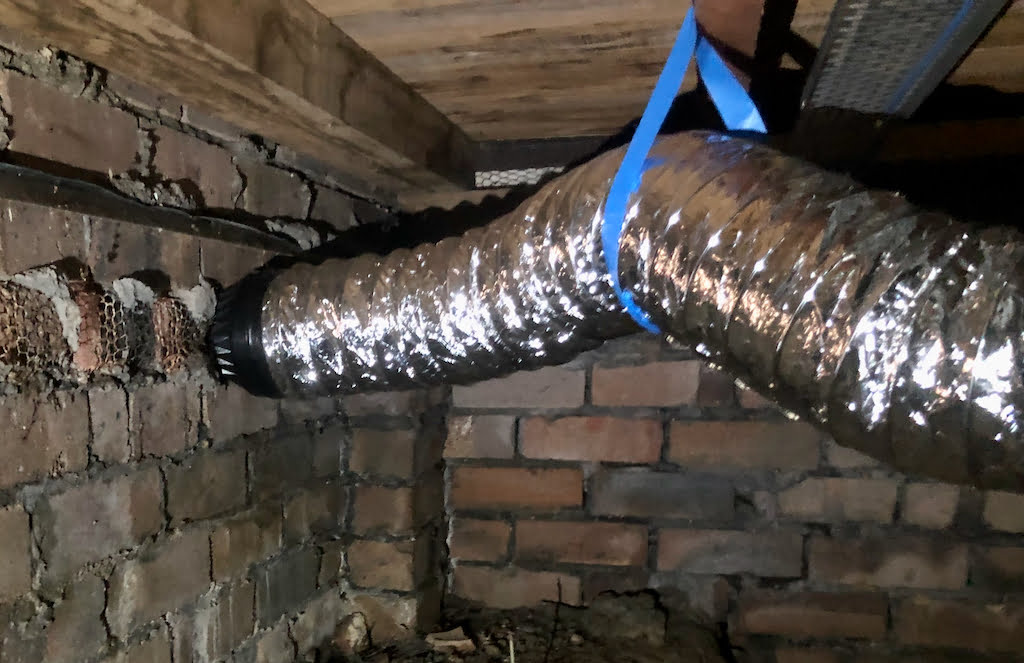
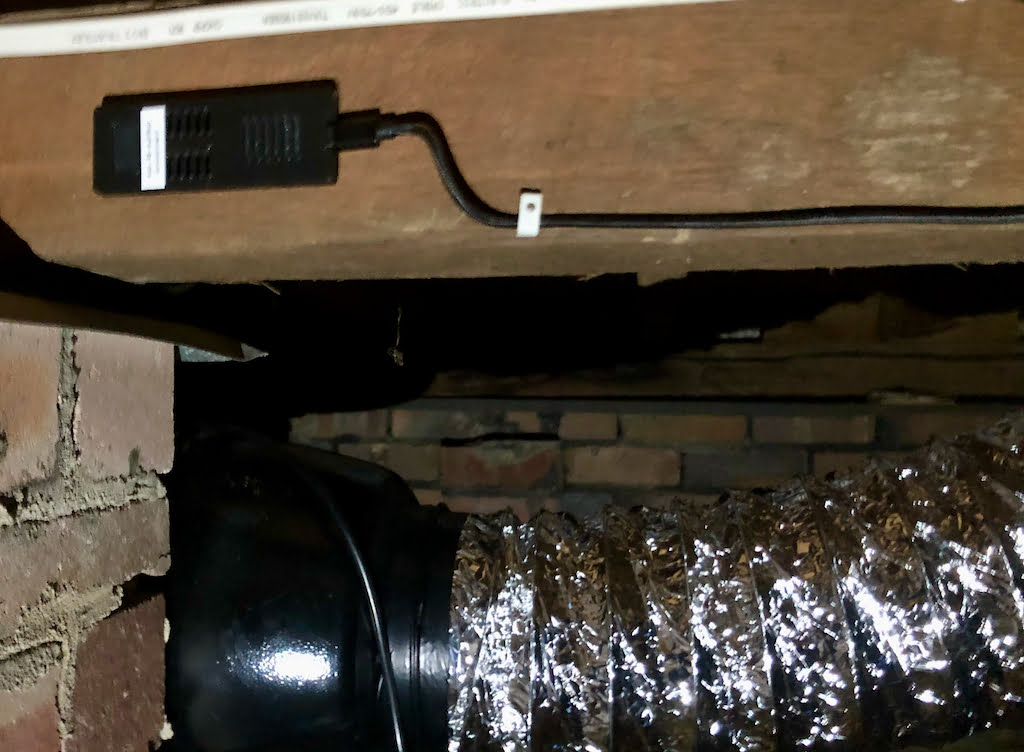
I installed the fan itself close to the outlet in the wall and onto a brick column under the house.
The vent holes in the brick walls are all rectangular while the duct is round with a 150mm diameter. I wanted to avoid drilling a huge round hole into the wall, and thus decided to 3D print an adapter that fits exactly into an existing hole in the wall and into the duct.
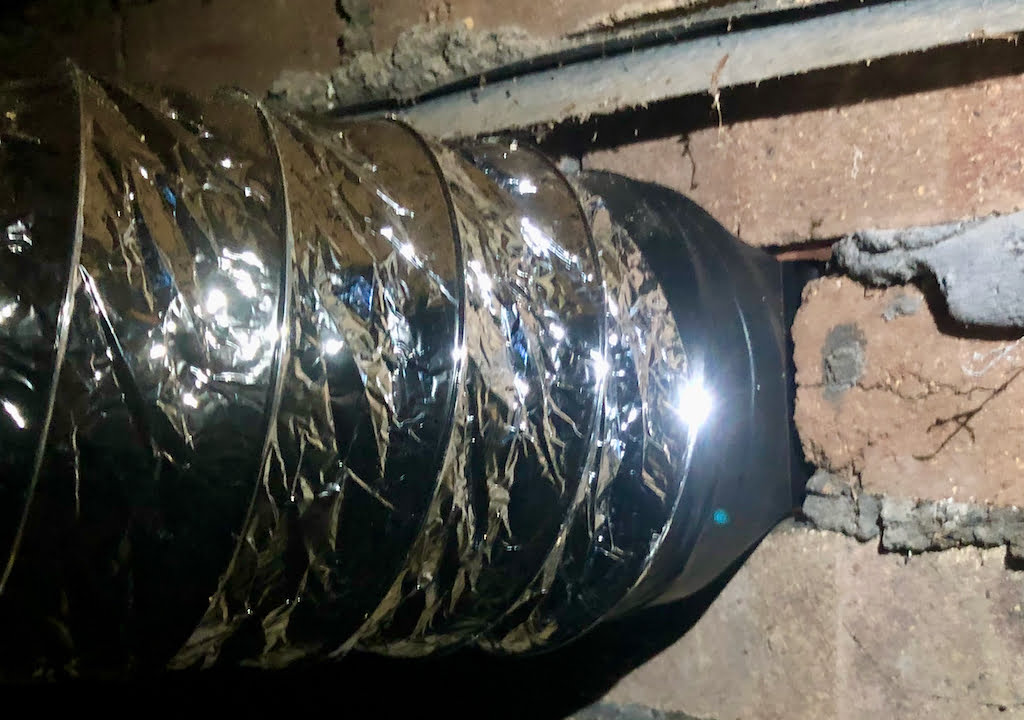
The only thing I would change in a future version of this 3D printed adapter would be to move the round side up and off the centre to reduce the risk that rain can enter the duct (we occasionally have very heavy rain, heavy wind and it rains sideways).
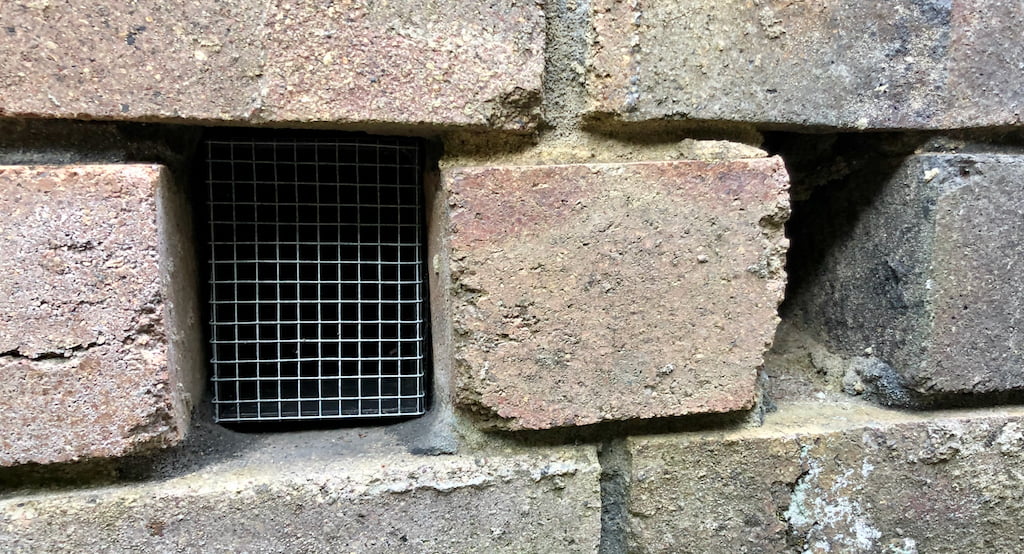
On the outside I added some mesh to keep rodents and insects out of the system.
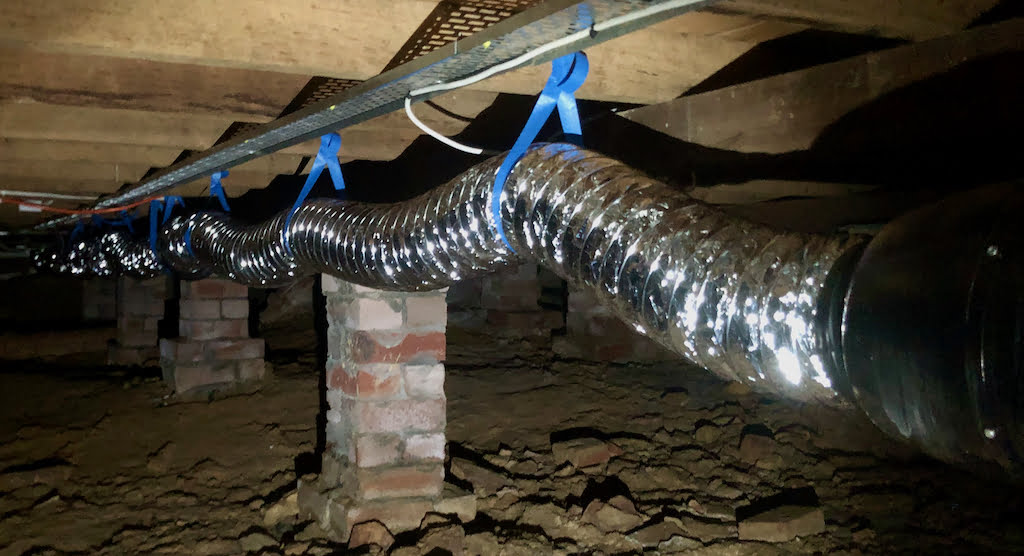
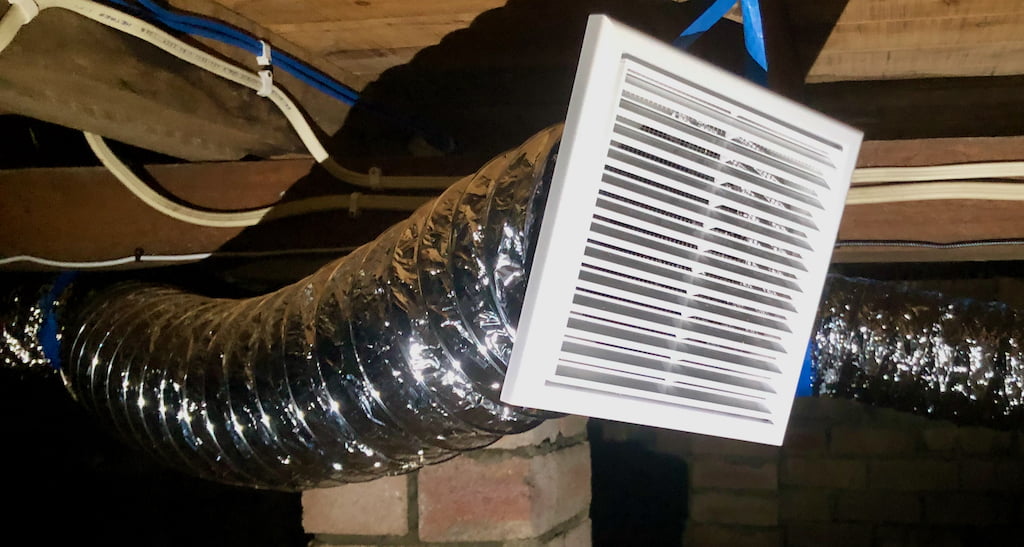
The installation of the ducting itself is fairly straightforward; the kit comes with simple straps that can be stapled onto the joists to suspend the ducting including the air inlets under the floor.
Modifying the fan
Most of the ventilation kits I found come with a very simple timer plug that goes between fan and power outlet and really just allows for turning the fan on and off at fixed times. And that might be fine if you really only want to get the air flowing from time to time. However, I am specifically interested in keeping my subfloor dry, and hence need a more sophisticated remote control.
Depending on what you may already have available and the actual fan you have chosen, a remote controllable plug might be the way to go. In my case I decided to install a Shelly 1PM to achieve my goal.
Be aware that you are entering danger territory here. If you don’t know how to modify 240V devices, please just use a plug-in device to remote control your fan!
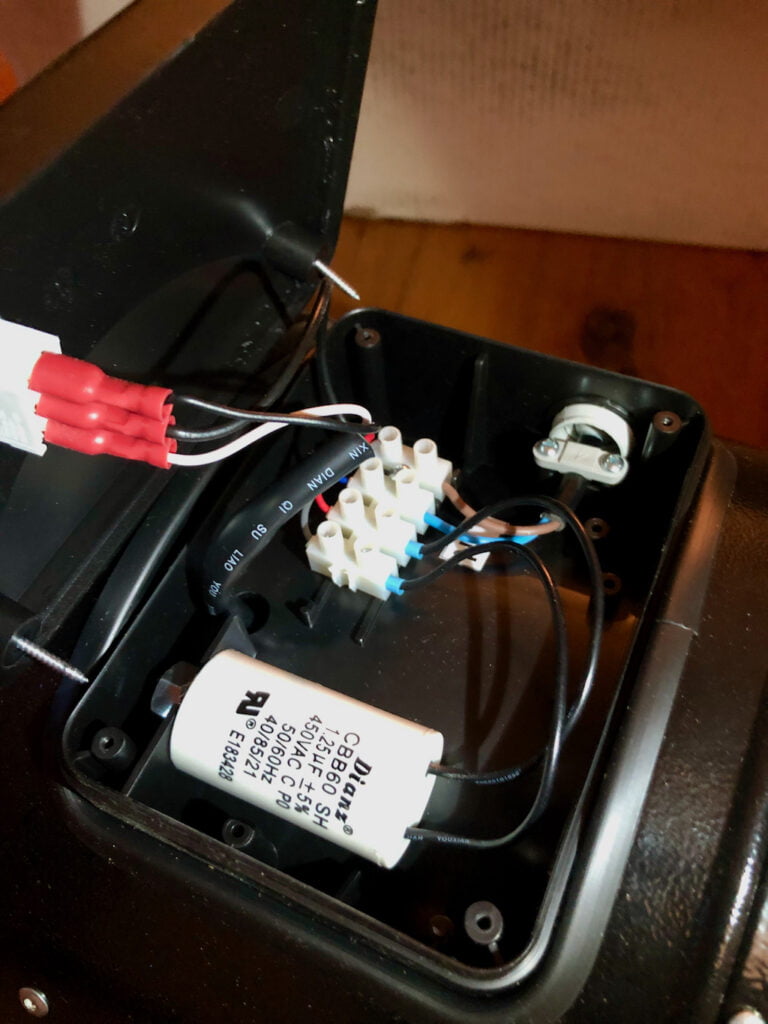
The case on top of the fan is large enough to easily house a Shelly 1PM, so space is not a problem at all. The other interesting question is: The fan itself comes with a 2-way switch which essentially turns on the fan into two different speeds. Instead of using a Shelly 2.5 to somehow wire the 2-way switch into that and be able to remote control two different speeds, I decided to keep it simple and only use the Shelly 1PM to turn on/off the fan at the speed that is selected by the physical switch. After all, I can now turn the fan on/off remotely.
The trade-off that you need to make is: Either turn on the fan at high speed which is louder but you may only need to run it for a shorter period of time vs. select the lower speed which is softer but you may run the fan longer. I decided to go with the latter option for now.
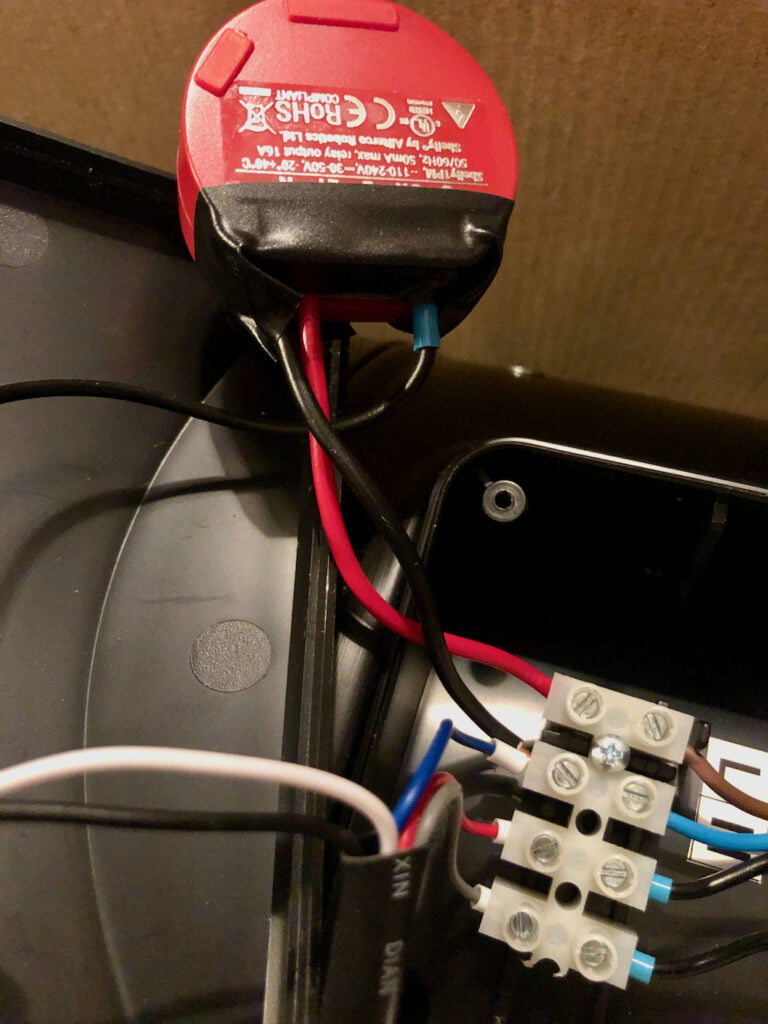
The actual wiring is fairly straightforward:
- From the terminal strip, remove the wire from the top left and connect it to the Shelly’s O pin.
- Connect a new wire from the terminal strip’s top left to Shelly’s L1 pin.
- Connect a new wire from the terminal strip’s second row from the top to the Shelly’s N pin.
Turning Shelly device into fan
By default the Shelly device presents itself as a switch in Home Assistant. Of course this switch can be used in the following automation, but I thought it would be neater to wrap the switch in a template fan.
fan:
  - platform: template
    fans:
      subfloor_centre:
        friendly_name: "Subfloor Centre Fan"
        value_template: "{{ states('switch.shelly_subfloor_fan') }}"
        turn_on:
          service: switch.turn_on
          target:
            entity_id: switch.shelly_subfloor_fan
        turn_off:
          service: switch.turn_off
          target:
            entity_id: switch.shelly_subfloor_fan
        availability_template:  "{{ not is_state('switch.shelly_subfloor_fan', 'unavailable')  }}"
Measuring temperature, humidity and dew point
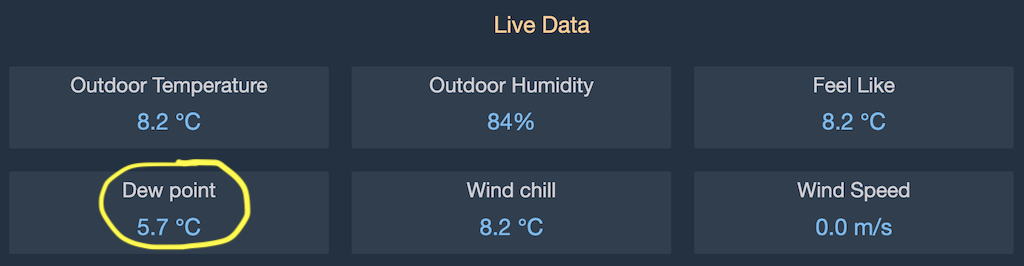
Outside
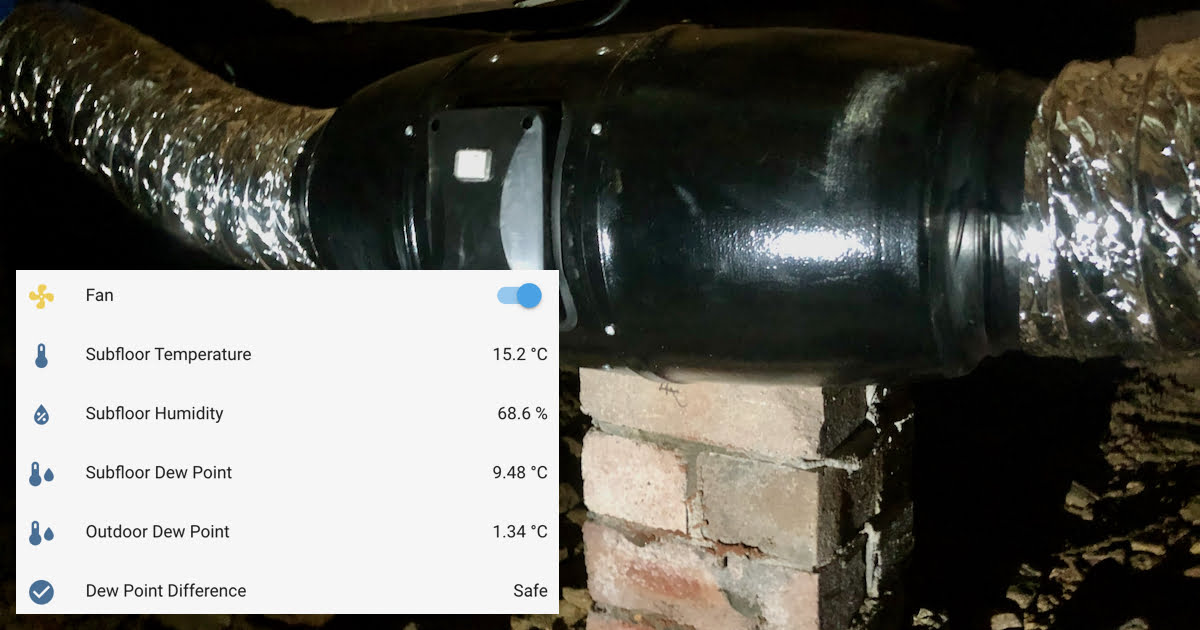
I have an Ecowitt weather station on the roof which already measures outside temperature and humidity, and also calculates the dew point, so I just use that value.
Inside
Because access to that particular subfloor area is rather difficult I wanted to avoid battery powered sensors and decided to build two very simple devices myself each consisting of a Lolin D1 Mini v4 and a SHT31-D sensor, running ESPHome. The devices are powered via USB and I just purchased some USB extension cables to install them where I wanted under the house.
Dew Point
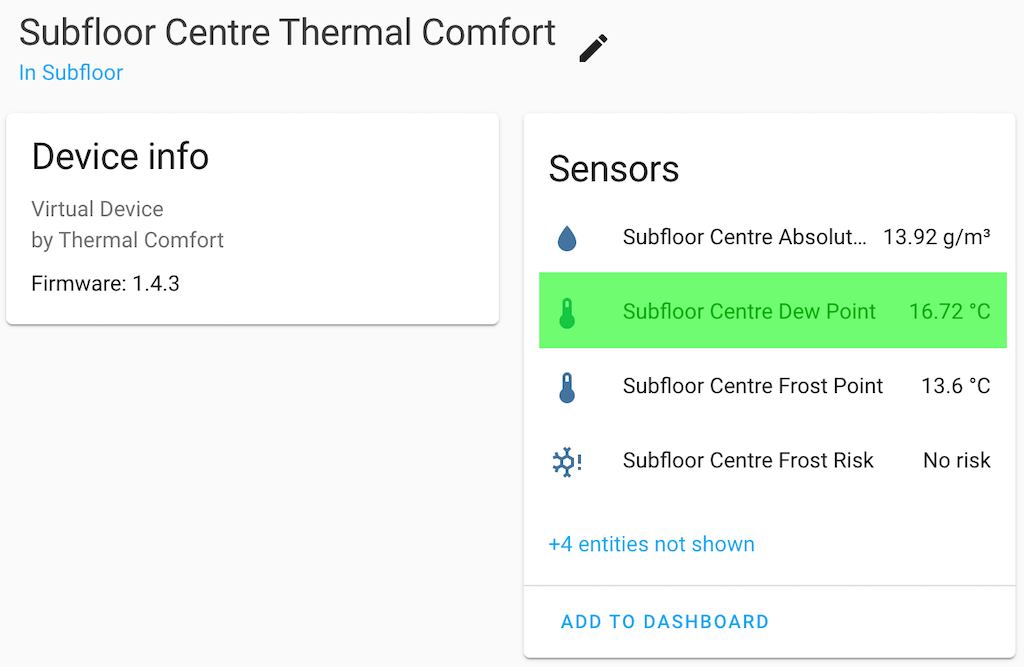
Calculating the dew point can become a bit complicated. Luckily there is a HACS library “thermal_comfort” that helps calculating the dew point. And because I actually installed two devices measuring temperature and humidity, I even went through the effort to calculate the average temperature and humidty and then use those values as the input to the thermal_comfort integration.
Automating the fan
General approach
The automation of the fan follows these principles:
- The fan only runs during daytime.
- The fan only runs if the difference between outside dew point and subfloor dew point is greater or equal to 2°C. I have defined a template binary sensor that compares those two values and also delays its state change by 10 minutes to ensure that the sensor is not flapping.
- The fan is turned on and off during the day to allow fresh air that entered the subfloor space to absorb moisture before the air is pulled out again.
Sensors and Helpers
To make this automation work and to retain a level of control a couple of template sensors and helpers are required:
- A template binary sensor that compares the two dew points – outside and under the house – and turns off if the difference is greater or equal to 2°C. I defined a device class “safety” for this which maps the off state to “Safe”, which I here interpret as safe to run the fan.
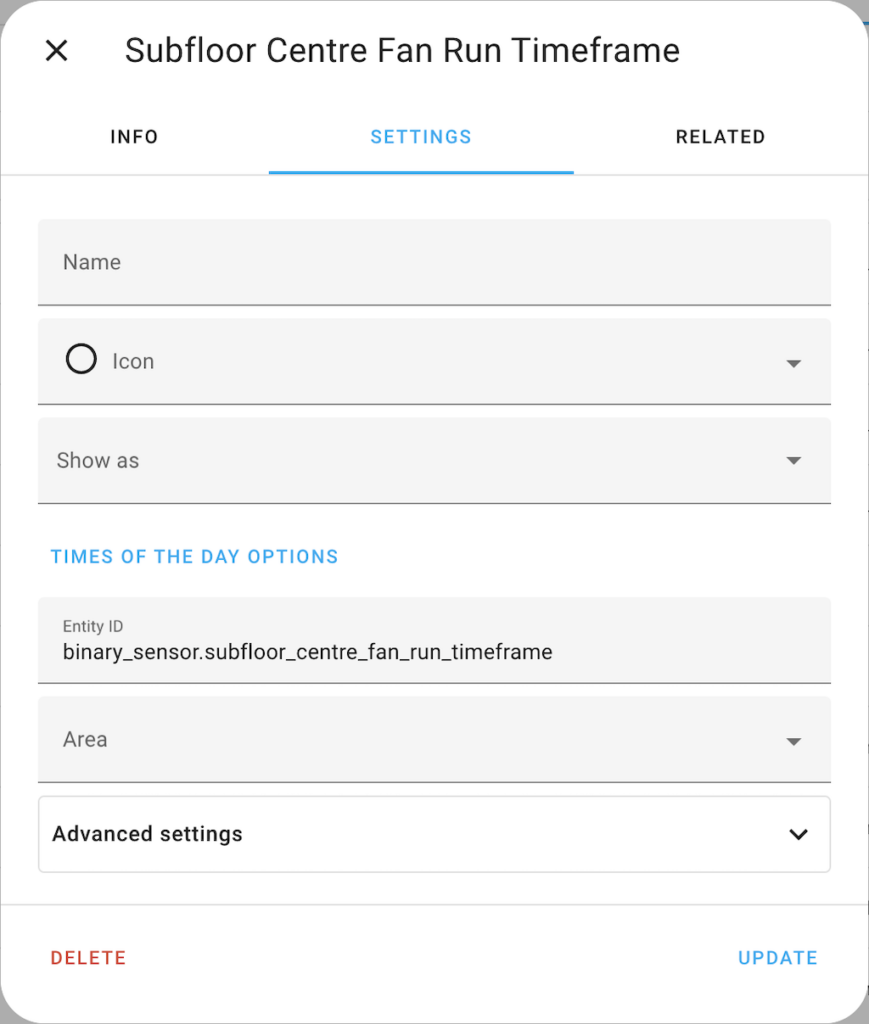
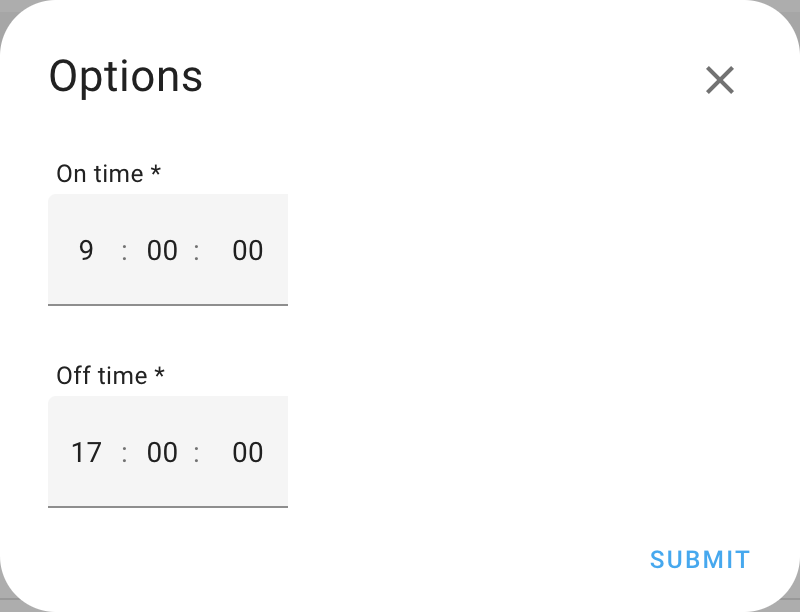
- A “Times of the Day” sensor that turns on between a defined start and end time each. I decided to keep it on from 9:00 to 17:00 each day.
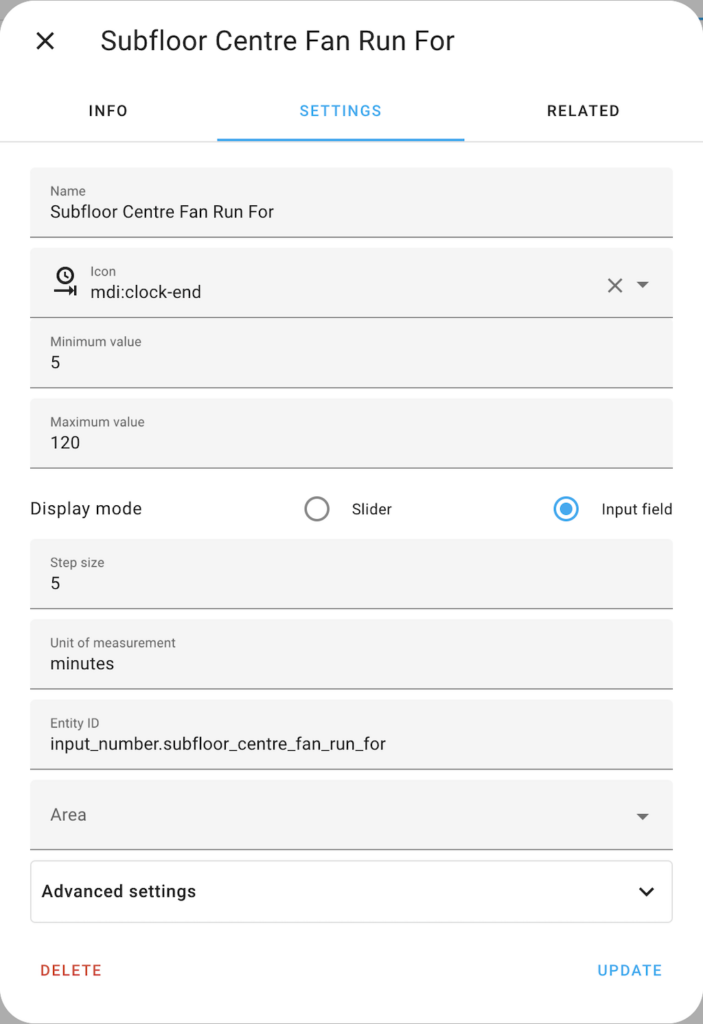
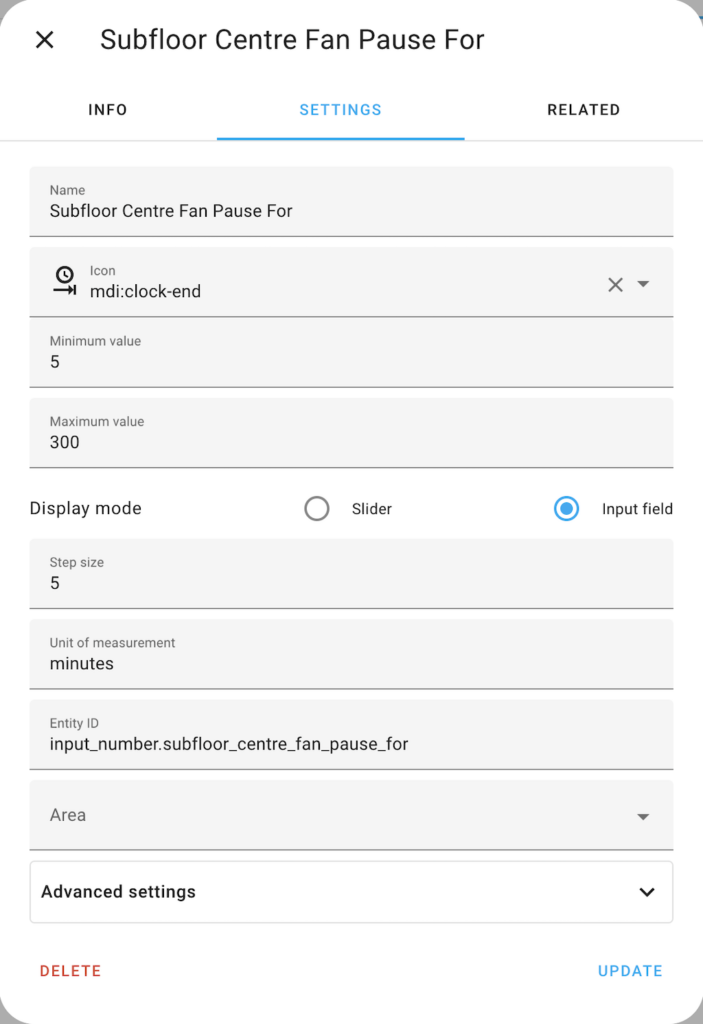
- Two “Number” helpers; one that defines the time in minutes that the fan should run, and a second one that defines for how long the fan should pause.
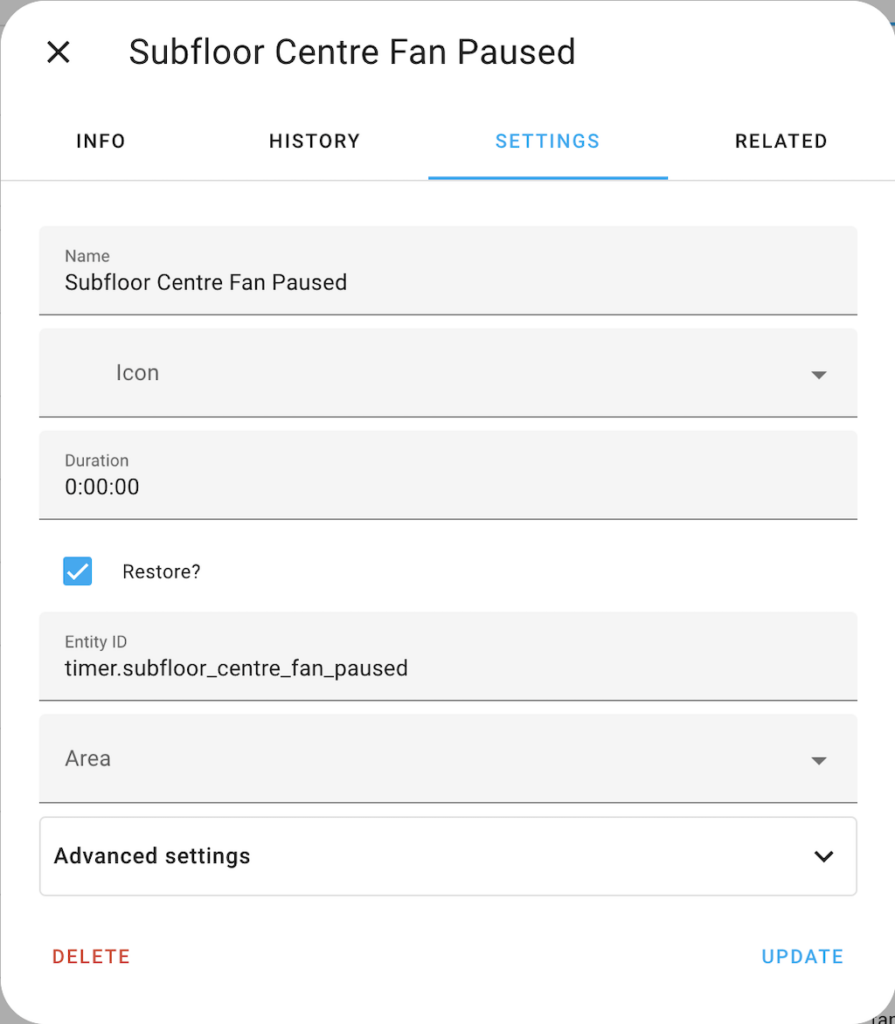
- Two corresponding “Timers”; one used when the fan is running, and another one used when the fan is paused.
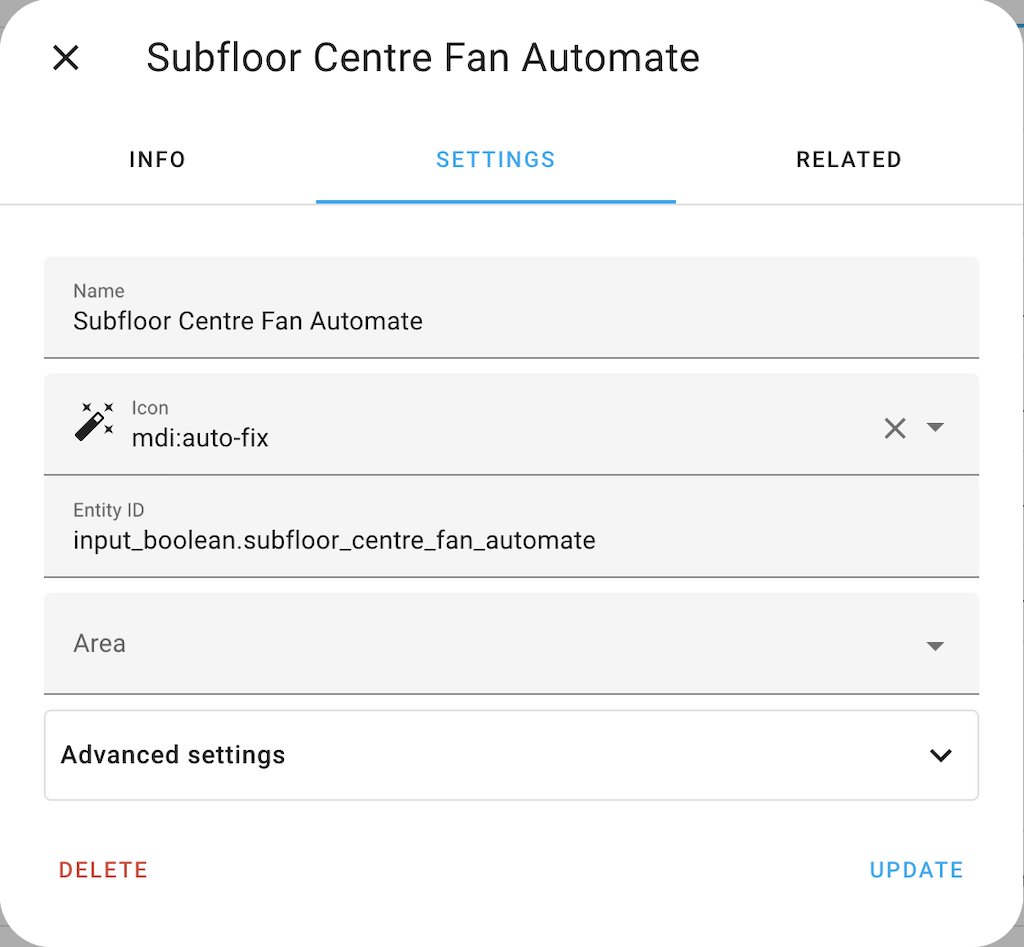
- A “Toggle” helper that is used to control whether or not the fan is supposed to be automated or not. This allows for full manual control when needed.
- A history stats sensor that measures the total time that the fan is running each day.
Template sensor comparing dew points
template:
  - binary_sensor:
      # Sensor is "on" = "unsafe" means the temperature difference is too small.
      - name: "Subfloor Centre Dew Point Difference"
        unique_id: subfloow_centre_dew_point_difference
        state: "{{ (states('sensor.subfloor_centre_dew_point') | float(0.0) - states('sensor.pws_outdoor_dew_point') | float(0.0)) < 2.0  }}"
        device_class: safety
        delay_on:
          minutes: 10
        delay_off:
          minutes: 10
        availability: "{{ not is_state('sensor.subfloor_centre_dew_point', 'unavailable') and not is_state('sensor.subfloor_centre_dew_point', 'unknown') and not is_state('sensor.pws_outdoor_dew_point', 'unavailable') and not is_state('sensor.pws_outdoor_dew_point', 'unknown') }}"
Times of the Day
Number and Timer for running fan

Number and Timer for paused fan
Toggle
History stats sensor for fan run duration
sensor:
- platform: history_stats
name: "Subfloor Centre Fan Running Today"
entity_id: fan.subfloor_centre
state: 'on'
type: time
start: '{{ now().replace(hour=0).replace(minute=0).replace(second=0) }}'
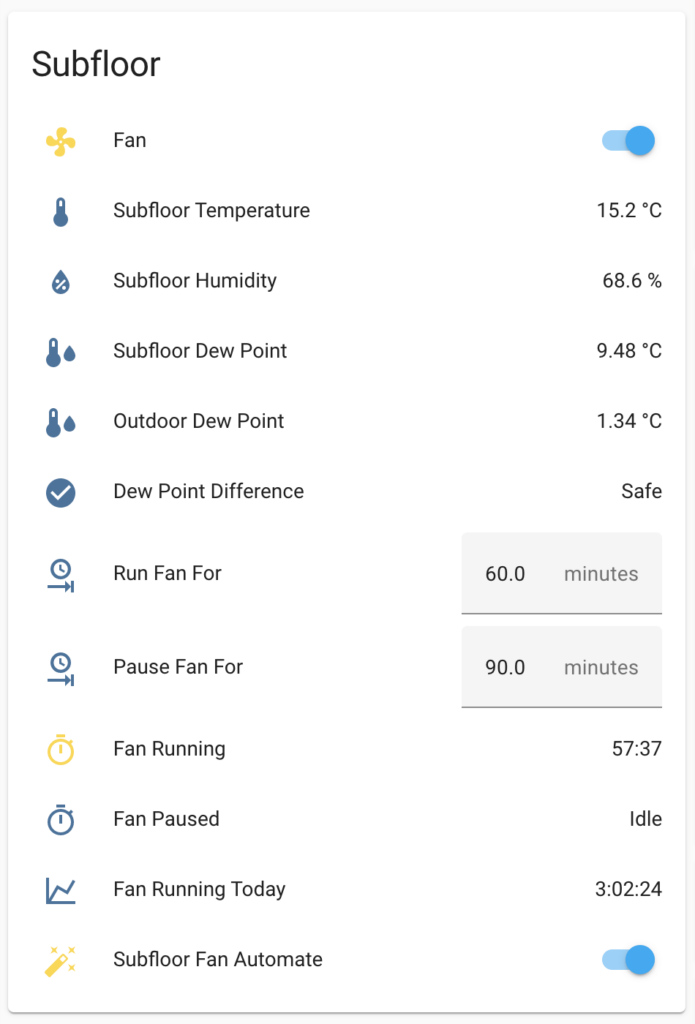
end: '{{ now() }}'Overview of all entities
Automation
With all the features added to Home Assistant’s automation options, I was able to condense all aspects into a single automation that controls the state of the fan under all circumstances (also thanks to user swa72 in the community forum for some great inspiration).
alias: Subfloor Centre Fan
trigger:
  - platform: state
    entity_id:
      - binary_sensor.subfloor_centre_dew_point_difference
    from: 'on'
    to: 'off'
    id: dew_point_difference_safe
  - platform: state
    entity_id:
      - binary_sensor.subfloor_centre_dew_point_difference
    from: 'off'
    to: 'on'
    id: dew_point_difference_unsafe
  - platform: event
    event_type: timer.finished
    event_data:
      entity_id: timer.subfloor_centre_fan_running
    id: fan_running_finished
  - platform: event
    event_type: timer.finished
    event_data:
      entity_id: timer.subfloor_centre_fan_paused
    id: fan_paused_finished
  - platform: state
    entity_id:
      - binary_sensor.subfloor_centre_fan_run_timeframe
    from: 'off'
    to: 'on'
    id: run_timeframe_start
  - platform: state
    entity_id:
      - binary_sensor.subfloor_centre_fan_run_timeframe
    from: 'on'
    to: 'off'
    id: run_timeframe_end
  - platform: state
    entity_id:
      - input_boolean.subfloor_centre_fan_automate
    from: 'off'
    to: 'on'
    id: automate_fan_on
  - platform: state
    entity_id:
      - input_boolean.subfloor_centre_fan_automate
    from: 'on'
    to: 'off'
    id: automate_fan_off
condition:
  - condition: state
    entity_id: input_boolean.subfloor_centre_fan_automate
    state: 'on'
action:
  - choose:
      - conditions:
          - condition: trigger
            id:
              - dew_point_difference_safe
              - run_timeframe_start
              - fan_paused_finished
              - automate_fan_on
          - condition: state
            entity_id: binary_sensor.subfloor_centre_dew_point_difference
            state: 'off'
          - condition: state
            entity_id: binary_sensor.subfloor_centre_fan_run_timeframe
            state: 'on'
        sequence:
          - service: fan.turn_on
            data: {}
            target:
              entity_id: fan.subfloor_centre
          - service: timer.start
            data:
              duration: >-
                {{states('input_number.subfloor_centre_fan_run_for') | int *
                60}}
            target:
              entity_id: timer.subfloor_centre_fan_running
      - conditions:
          - condition: trigger
            id: fan_running_finished
        sequence:
          - service: fan.turn_off
            data: {}
            target:
              entity_id: fan.subfloor_centre
          - service: timer.start
            data:
              duration: >-
                {{states('input_number.subfloor_centre_fan_pause_for') | int *
                60}}
            target:
              entity_id: timer.subfloor_centre_fan_paused
      - conditions:
          - condition: trigger
            id:
              - run_timeframe_end
              - dew_point_difference_unsafe
        sequence:
          - service: fan.turn_off
            data: {}
            target:
              entity_id: fan.subfloor_centre
          - service: timer.cancel
            data: {}
            target:
              entity_id:
                - timer.subfloor_centre_fan_running
                - timer.subfloor_centre_fan_paused
      - conditions:
          - condition: trigger
            id: automate_fan_off
        sequence:
          - service: timer.cancel
            data: {}
            target:
              entity_id:
                - timer.subfloor_centre_fan_running
                - timer.subfloor_centre_fan_paused
mode: queued
Outlook
So far the fan and its automation is working fine. I haven’t actually added any kind of notifications yet, for example to notify me how many hours the fan actually ran each day or maybe just to notify me if it hasn’t run for several subsequent days.
Compatibility
At the time of writing this post, I used:
- Home Assistant 2022.6.7 with Python 3.9.12
- Shelly 1PM on firmware v1.11.8
- Ecowitt WS80 sensor with GW1100 gateway on firmware v2.1.5
Leave a Reply