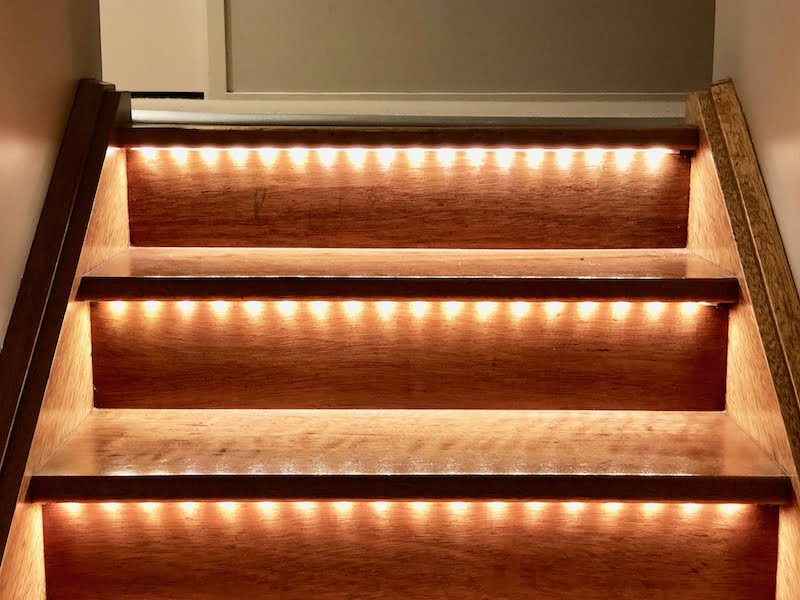
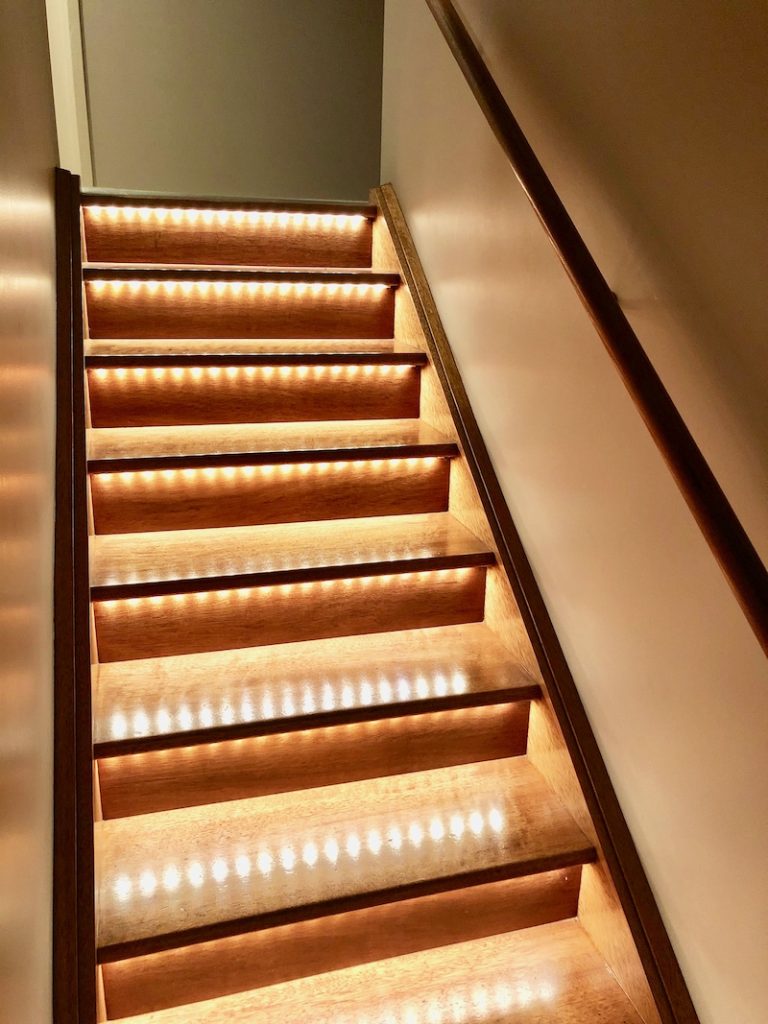
This project is a simple IKEA hack that I wanted to share because it just looks great. The lights are integrated into Home Assistant and are fully automated – no light switch necessary.
The stairs I am illuminating in the project are connecting our ground and first floor and have 9 steps. The stairs are always a little in the dark because neither downstairs nor upstairs lamps are reaching them very well. Luckily I have full access under the house to easily get behind the stairs, for example to run cables.
Assembling the parts
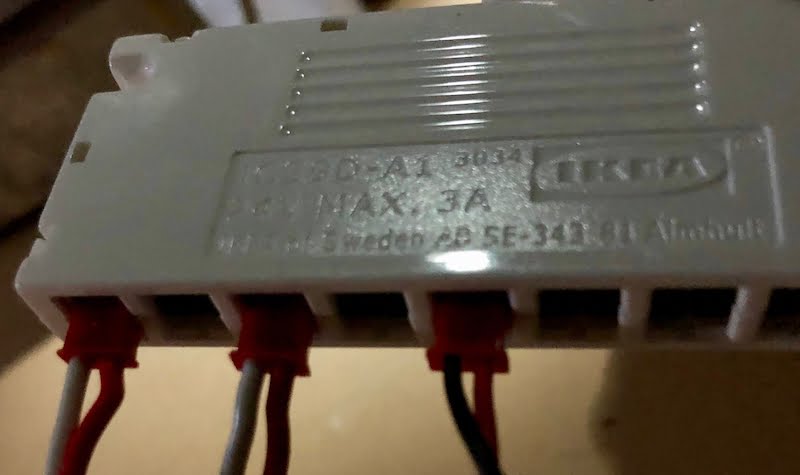
Inspired by someone else who hacked IKEA products, I used IKEA’s TRÅDFRI LED driver which supports LEDs up to 30W, and 2x LEDBERG lighting strips (driver and LED strip both are 24V). These strips can be cut every 25 centimetres and I cut 9 strips at 75 centimetres each. The strip is rated at 7W; that makes 1.4W per metre; I am using 9 parts at 75cm = 6.75m; that comes to a total of 9.45W, so I guess in hindsight I could have as well used the smaller TRÅDFRI LED driver.
Preparing the LED Strips
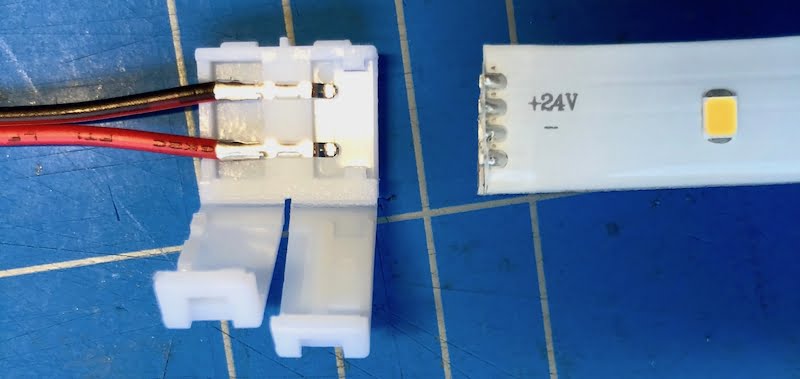
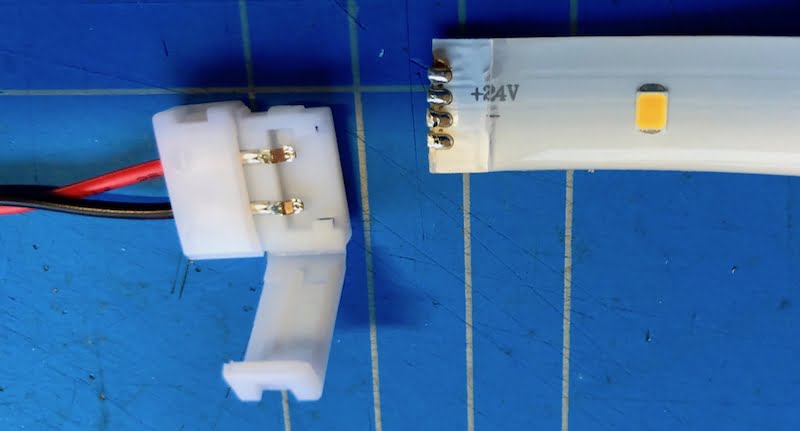
The lighting strip is 12mm wide, and I was looking for a cable connector to make my life a bit easier. Unfortunately I could only find cable connectors for 10mm LED strips and had to modify the strip a little bit.
The first thing to do is to check polarity of the LED strip cut against the connector cables. In the example below it is the wrong way – assuming that we go with the convention that black is negative and red is positive.
The cables can be carefully removed.
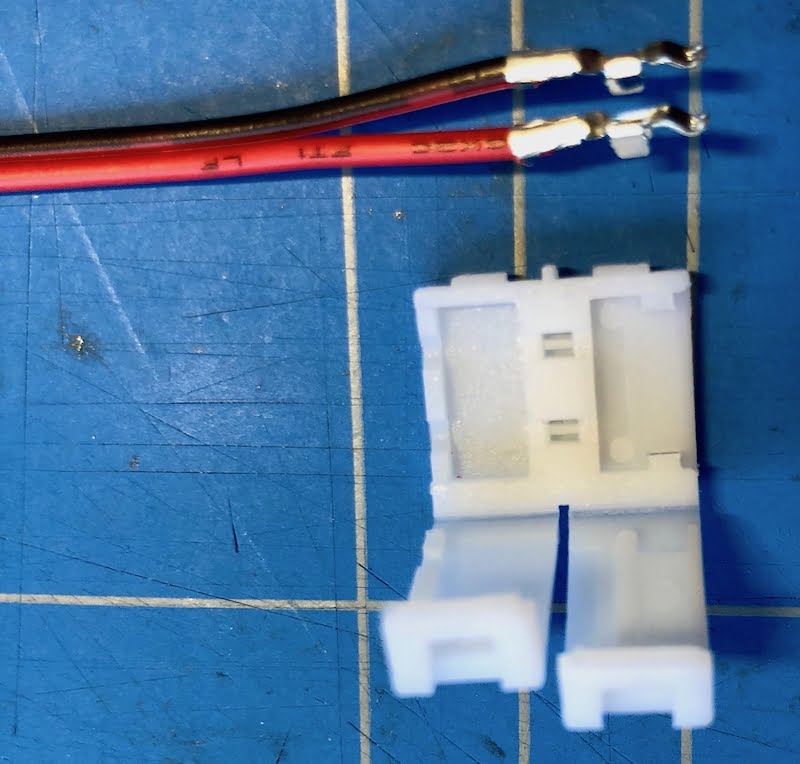
And then remounted so that red faces + and black faces -.
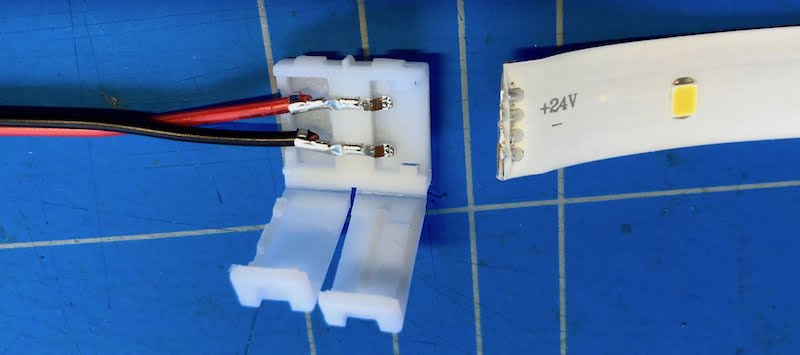
A couple of millimetres of the silicone sealing need to be removed.
And 1 millimetre of the strip itself need to be removed on each side.
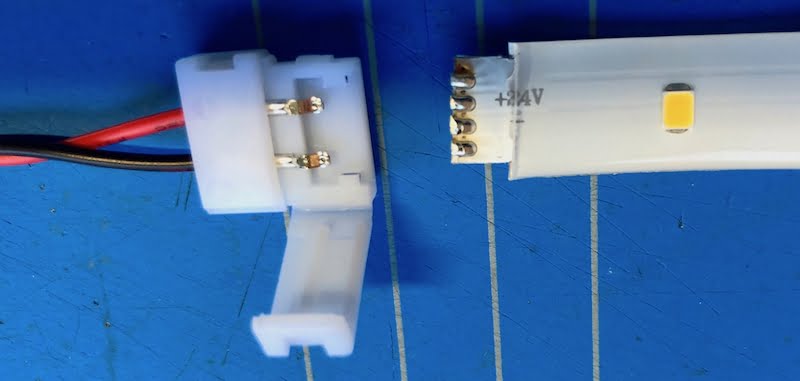
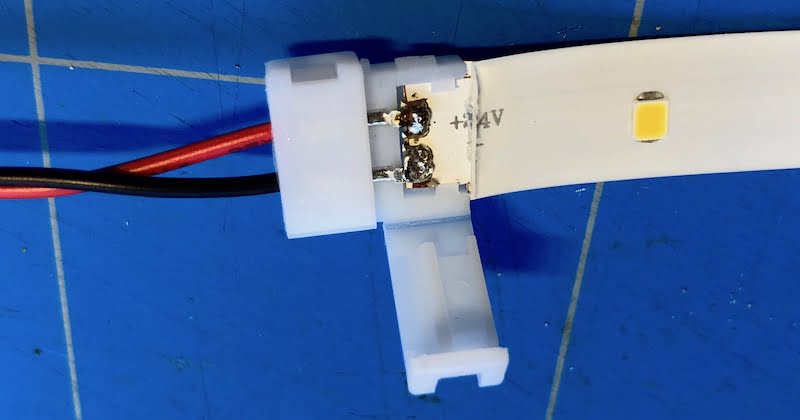
Now the strip should fit into the connector. It may be a bit easier to slide the strip in after slightly lifting the metal pins.

For some reason the LEDBERG lighting strips exposes 4 little connectors, but only the inner 2 are the relevant ones, so I had to solder the 2 pins of the cable connectors on to ensure that the LEDs are properly powered.
And here are all 9 LED strip cuts lined up. I extended each one by another 50-200 centimetres using a 2-pin double insulated 18 AWG cable.

Mounting the LED strips under the steps
I am not using an aluminium tray for the LED strip but just stuck it under each step, in the hope that this will last for a while. I drilled a small hole into the step for the cable.
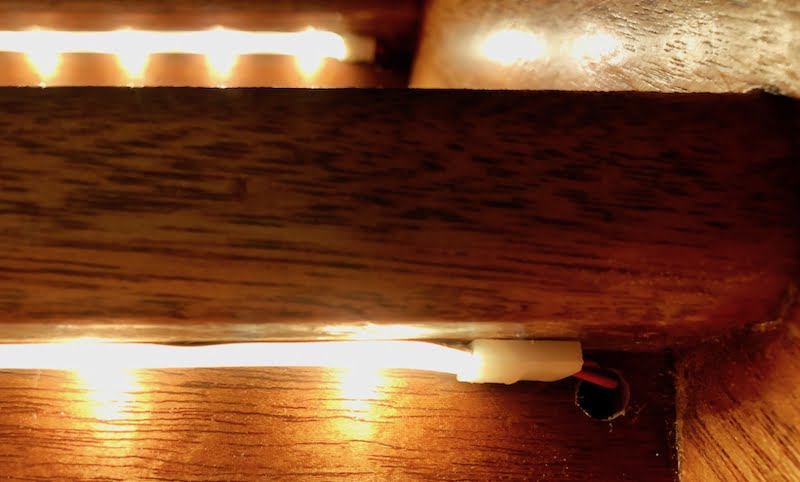
To ensure that the small holes do not become a new way for crawling insects to get into the house, I sealed them with transparent silicone.
Under the stairs
Under the stairs I have installed a small aggregator where I am just joining the cables from three steps into one, before they connect into the LED driver. This is really just to reduce the number of cables from nine to three.
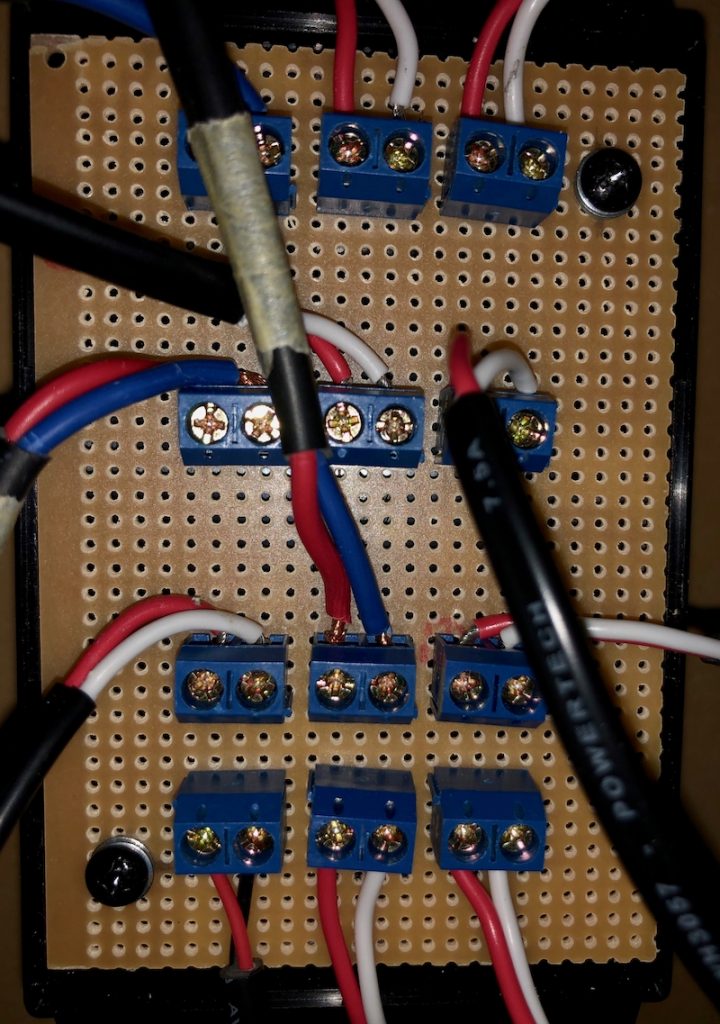
A total of 12 PCB mount screw terminal blocks are soldered onto a stripboard PCB. In each column the terminal block at the bottom is connected to the LED driver, and the three terminal blocks above are connected to LED strips.
The above looks a bit messy, but the whole PCB fits into a small plastic box which helps tidying up the cables to the LED strips.
Connecting to LED driver
For the connection of the lights to the LED driver I made custom cables with a JST connector that fits into the little outlets of the LED driver. These connectors are not locking like the standard TRÅDFRI light strips do, so the driver and the cables need to be installed in a place where the cables do not come loose all the time.
Integration into Home Assistant
For ZigBee devices such as the TRÅDFRI LED driver I use Phoscon with a ConBee stick. Once the new LED driver is added to Phoscon I would recommend to name it properly, add it to a room and make sure you can control the lights, before refreshing in Home Assistant where the LED driver should then show up as a new light.
In the following configuration examples the LED driver is available as entity light.stairs_light.
Timer
I found using a timer to be a convenient way to control motion-based lights.
timer:
  stairs_lights:
    name: Stairs Lights Timer
    duration: '00:10:00'
Scripts
To control the lights I implemented several scripts which take care of smooth transitions.
script:
  stairs_start_timer:
    alias: "Start stairs lights timer"
    sequence:
      - service: timer.cancel
        data:
          entity_id: timer.stairs_lights
      - service: timer.start
        data:
          entity_id: timer.stairs_lights
  stairs_full_light_transition:
    alias: "Stairs full lights"
    sequence:
      - service: light.turn_on
        data:
          entity_id: light.stairs_light
          brightness: 255
          transition: 5
  stairs_night_light_transition:
    alias: "Stairs night lights"
    sequence:
      - service: light.turn_on
        data:
          entity_id: light.stairs_light
          brightness: 128
          transition: 15
  stairs_light_off_transition:
    alias: "Stairs lights off"
    sequence:
      - service: light.turn_off
        data:
          entity_id: light.stairs_light
          transition: 15
Automations
I implemented a couple of automations to control the lights:
- Turn on full lights when motion detected (on a couple of motion sensors around the stairs) and it’s after sunset. Start a 10 minute timer.
- Turn on full lights at sunset when there is already motion detected. Start a 10 minute timer.
- Dim the lights when the 10 minute timer has finished.
- Turn off the lights at sunrise.
automation:
  - alias: "Turn on stairs full lights"
    trigger:
      - platform: state
        entity_id:
          - binary_sensor.motion_sensor_1
          - binary_sensor.motion_sensor_2
        to: 'on'
    condition:
      condition: or
      conditions:
        - condition: sun
          after: sunset
          after_offset: '-0:30:00'
        - condition: sun
          before: sunrise
          before_offset: '00:30:00'
    action:
      service: script.turn_on
      entity_id:
        - script.stairs_start_timer
        - script.stairs_full_light_transition
  - alias: "Turn on stairs full lights at sunset"
    trigger:
      - platform: sun
        event: sunset
    condition:
      condition: or
      conditions:
        - condition: state
          entity_id: binary_sensor.motion_sensor_1
          state: 'on'
        - condition: state
          entity_id: binary_sensor.motion_sensor_2
          state: 'on'
    action:
      service: script.turn_on
      entity_id:
        - script.stairs_start_timer
        - script.stairs_full_light_transition
  - alias: "Restart stairs timer"
    trigger:
      platform: event
      event_type: timer.finished
      event_data:
        entity_id: timer.stairs_lights
    condition:
      condition: or
      conditions:
        - condition: state
          entity_id: binary_sensor.motion_sensor_1
          state: 'on'
        - condition: state
          entity_id: binary_sensor.motion_sensor_2
          state: 'on'
    action:
      service: script.turn_on
      entity_id: script.stairs_start_timer
  - alias: "Turn on stairs night lights"
    trigger:
      platform: event
      event_type: timer.finished
      event_data:
        entity_id: timer.stairs_lights
    condition:
      condition: and
      conditions:
        - condition: state
          entity_id: binary_sensor.motion_sensor_1
          state: 'off'
        - condition: state
          entity_id: binary_sensor.motion_sensor_2
          state: 'off'
        - condition: or
          conditions:
            - condition: sun
              after: sunset
              after_offset: '-0:30:00'
            - condition: sun
              before: sunrise
              before_offset: '00:30:00'
    action:
      service: script.turn_on
      entity_id: script.stairs_night_light_transition
  - alias: "Turn off stairs lights"
    trigger:
      - platform: sun
        event: sunrise
        offset: '00:30:00'
    action:
      service: script.turn_on
      entity_id: script.stairs_light_off_transition
Result
Future improvements
Using motion sensors to control lights is not too bad for now, but I am actually missing one more to cover all areas that someone could approach the stairs from. As an alternative I have just received a few RCWL-0516 microwave sensors that I could install under the stairs. Because they are not directional and can cover a distance of up to seven metres, I want to explore if I can reduce their sensitivity to really only cover the stairs plus maybe another 50 centimetres at top and bottom.
And once I have improved the way to recognise if someone is walking up or down the stairs, I can probably continue fine-tuning the light automations a bit further.
Compatibility
At the time of writing this post, I used:
- Home Assistant 0.99.2 with Python 3.6.8
- Phoscon 2.05.69 with a ConBee stick
- IKEA TRÅDFRI LED driver 30W (firmware 1.2.245) with LEDBERG strips
Leave a Reply