Features
- Native status bar app.
- Connects to your local Microsoft Teams app via a local API.
- Shares information about ongoing Teams meetings with Home Assistant through a webhook.
- App can autostart after login.
- Supported on macOS (Apple arm64 and Intel x86_64 supported)
- Open-source and developed in Python. Contributions are welcome.

Installing Teams Connex
Download the latest version to your local computer. Double-click the downloaded file to unzip. Create a folder Applications in your user folder if that does not exist yet, and copy the Teams Connex application into the Applications folder.
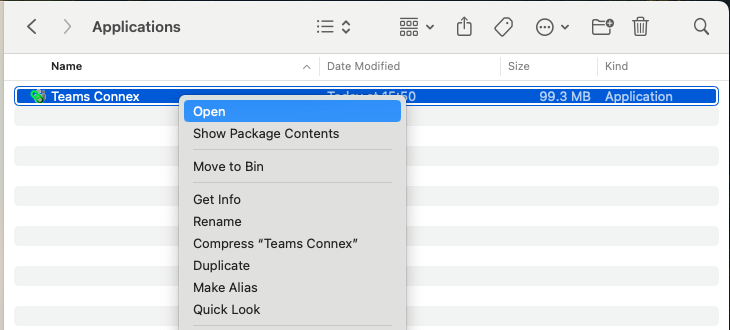
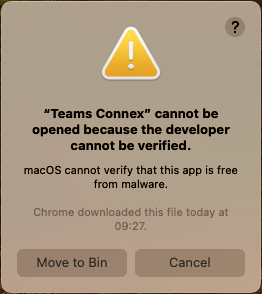
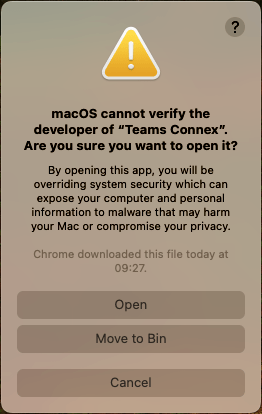
The first time you start the application (and each time you update to a new version), right-click the application and select Open, and then click Cancel on the warning message that popped up. Again right-click the application and select Open, and this time click Open on the warning message that popped up.
| Please Note |
|---|
| This cumbersome process is unfortunately required at this point in time because the application is not signed by Apple. If there is sufficient interest in this application in the future, I might consider signing up for an Apple developer account to be able to properly package the application and avoid all these warning messages. |
Configuring Teams Connex
Status bar icon
![]() The grey icon is shown whenever the connection to Teams is lost.
The grey icon is shown whenever the connection to Teams is lost.![]() The blue icon indicates that Teams is connected, but not paired or the webhook URI is missing.
The blue icon indicates that Teams is connected, but not paired or the webhook URI is missing.![]() The green icon is shown if Teams is connected and paired and the webhook URI is configured. In this state, the application is actively sending data to Home Assistant.
The green icon is shown if Teams is connected and paired and the webhook URI is configured. In this state, the application is actively sending data to Home Assistant.
Start at login
To start the Teams Connex app when you login to the computer, please check the Start at login menu item from the from the status bar menu.
Internally, this creates a file /Users/<username>/Library/LaunchAgents/Teams\ Connex.plist which contains the technical details for the Teams Connex app to be started automatically.
Home Assistant setup and webhook URL
A webhook is a special URL that Home Assistant provides and where applications can send data to. In Home Assistant you can base automations or template sensors on receiving new data from a webhook.
If you have used webhooks before, then you are probably aware that you can either completely manage them and access to your Home Assistant instance yourself. Or, you can sign up to Home Assistant Cloud (Nabu Casa) and let them manage webhhooks for you.
Setting up template sensors with webook trigger
The following YAML configuration snippet shows the template sensor setup based on a custom webhook. I recommend using packages in Home Assistant, and this YAML snippet can go straight into a new package file to work.
template:
  - trigger:
      - platform: webhook
        webhook_id: "teams_meeting_update"
        allowed_methods:
          - PUT
        local_only: false
    binary_sensor:
      - name: "Meeting State is muted"
        unique_id: meeting_state_is_muted
        state: "{{ trigger.json['meetingUpdate']['meetingState']['isMuted'] }}"
      - name: "Meeting State is video on"
        unique_id: meeting_state_is_video_on
        state: "{{ trigger.json['meetingUpdate']['meetingState']['isVideoOn'] }}"
      - name: "Meeting State is hand raised"
        unique_id: meeting_state_is_hand_raised
        state: "{{ trigger.json['meetingUpdate']['meetingState']['isHandRaised'] }}"
      - name: "Meeting State is in meeting"
        unique_id: meeting_state_is_in_meeting
        state: "{{ trigger.json['meetingUpdate']['meetingState']['isInMeeting'] }}"
      - name: "Meeting State is recording on"
        unique_id: meeting_state_is_recording_on
        state: "{{ trigger.json['meetingUpdate']['meetingState']['isRecordingOn'] }}"
      - name: "Meeting State is background blurred"
        unique_id: meeting_state_is_background_blurred
        state: "{{ trigger.json['meetingUpdate']['meetingState']['isBackgroundBlurred'] }}"
      - name: "Meeting State is sharing"
        unique_id: meeting_state_is_sharing
        state: "{{ trigger.json['meetingUpdate']['meetingState']['isSharing'] }}"
      - name: "Meeting State has unread messages"
        unique_id: meeting_state_has_unread_messages
        state: "{{ trigger.json['meetingUpdate']['meetingState']['hasUnreadMessages'] }}"
      - name: "Meeting Permissions can toggle mute"
        unique_id: meeting_permissions_can_toggle_mute
        state: "{{ trigger.json['meetingUpdate']['meetingPermissions']['canToggleMute'] }}"
      - name: "Meeting Permissions can toggle video"
        unique_id: meeting_permissions_can_toggle_video
        state: "{{ trigger.json['meetingUpdate']['meetingPermissions']['canToggleVideo'] }}"
      - name: "Meeting Permissions can toggle hand"
        unique_id: meeting_permissions_can_toggle_hand
        state: "{{ trigger.json['meetingUpdate']['meetingPermissions']['canToggleHand'] }}"
      - name: "Meeting Permissions can toggle blur"
        unique_id: meeting_permissions_can_toggle_blur
        state: "{{ trigger.json['meetingUpdate']['meetingPermissions']['canToggleBlur'] }}"
      - name: "Meeting Permissions can leave"
        unique_id: meeting_permissions_can_leave
        state: "{{ trigger.json['meetingUpdate']['meetingPermissions']['canLeave'] }}"
      - name: "Meeting Permissions can react"
        unique_id: meeting_permissions_can_react
        state: "{{ trigger.json['meetingUpdate']['meetingPermissions']['canReact'] }}"
      - name: "Meeting Permissions can toggle share tray"
        unique_id: meeting_permissions_can_toggle_share_tray
        state: "{{ trigger.json['meetingUpdate']['meetingPermissions']['canToggleShareTray'] }}"
      - name: "Meeting Permissions can toggle chat"
        unique_id: meeting_permissions_can_toggle_chat
        state: "{{ trigger.json['meetingUpdate']['meetingPermissions']['canToggleChat'] }}"
      - name: "Meeting Permissions can stop sharing"
        unique_id: meeting_permissions_can_stop_sharing
        state: "{{ trigger.json['meetingUpdate']['meetingPermissions']['canStopSharing'] }}"
I chose a custom webhook ID teams_meeting_update in this example. This ID needs to be unique in your Home Assistant instance, so make sure it is not used anywhere else already.
After adding the above template sensor configuration you can head to your Home Assistant UI and got to Developer Tools -> YAML -> YAML configuration reloading and click Template Entities to activate the above template sensors and webhook.
Find the webhook URL (local only)
You can a webhhok in your local network only without any need to open up access from the Internet. However, this limits Teams Connex to only be able to share information with your Home Assistant instance when your Mac is also in your local network. If you are working from home a lot and can access Home Assistant from your work Mac, that’s all fine. However, if for example you frequently connect to your work VPN then access to your local network may be blocked and the webhook won’t work anymore.
If you are still fine with local access only, your webhook URL most likely looks like this http://homeassistant.local:8123/api/webhook/teams_meeting_update unless you have made any other choices when setting up Home Assistant.
Find the webhook URL (self-configured remote access)
If you have configure remote access to your Home Assistant instance yourself, then you should know the public base URL where you then need to append /api/webhook/teams_meeting_update to get the full webhook URL required in Teams Connex.
Find the webhook URL (Nabu Casa or Home Assistant Cloud)
If you have signed up to Nabu Casa, then in your Home Assistant UI go to Settings -> Home Assistant Cloud -> Integrations -> Webhooks where you should find the newly created webhook in the list. Toggle the button on the right to on, and a dialogue pops up that contains the public webhook URL (starting with https://hooks.nabu.casa/...).
Configure webhook URL
To set your personal webhook URL in Teams Connex, select Settings… from the app’s status bar menu. This will open a new dialogue where you can enter the URL.
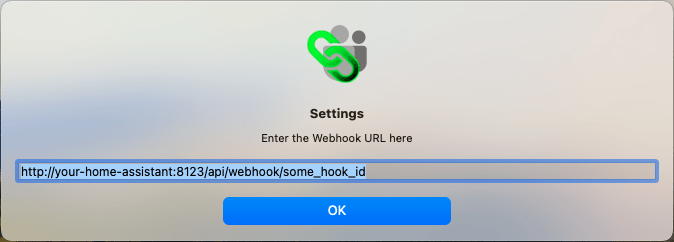
There is no further validation of this URL happening after you entered it.
Pairing with Teams
Immediately after starting Teams Connex, the app will try to connext to your local Microsoft Teams instance
Enable Teams API
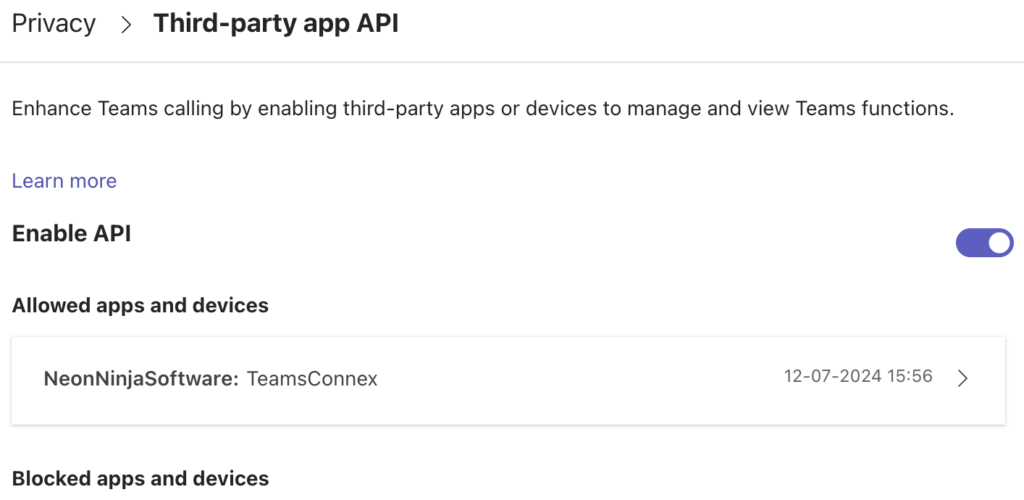
You may need to manually enable API access in Microsoft Teams if you have not used this feature before. To do that, go to the Microsoft Teams menu and select Settings…, then select Privacy in the settings window, then scroll all the way down on the right and click on Manage API. On the Third-party app API settings page, turn the Enable API slider on.
This settings page will then also show any apps that are allowed or blocked to use the local Teams API.
Pairing process
Microsoft Teams is only allowing pairing with third-party apps when a new meeting is initiated, and you will have to allow access for Teams Connex the very first time you are using it. Once Teams Connex is successfully paired with Microsoft Teams, a pairing token is stored in the Teams Connex settings and you should not be asked to allow access again.
An easy way to pair Teams Connex the very first time is to make a test call. To do that, go to the Microsoft Teams menu and select Settings…, then select Devices in the settings window and click the Make a test call button. A few seconds after the test call has started, Microsoft Teams should ask you to confirm whether or not you want to allow access for Teams Connex.
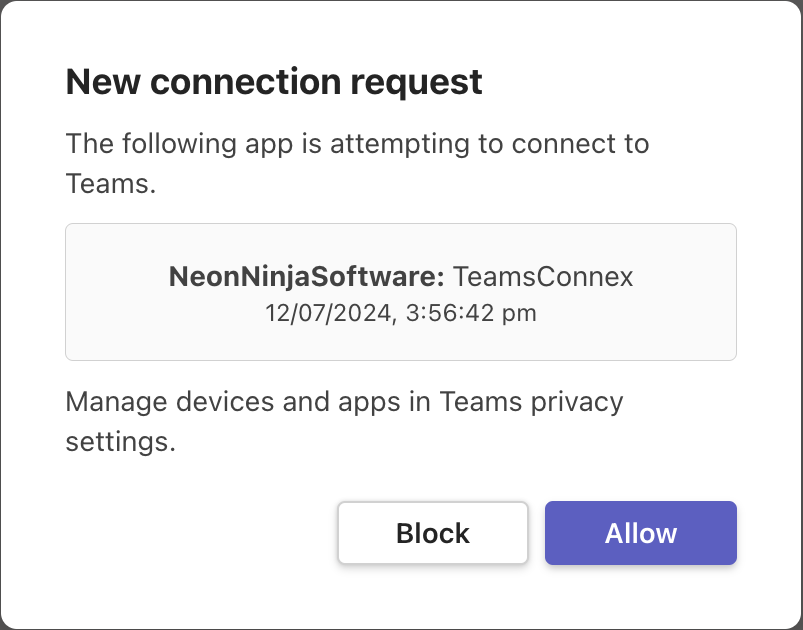
After you click Allow in this dialogue, the Teams Connex app should receive additional information about this and future calls, and send the details to your Home Assistant instance via the webhook (if that is already configured).
Check paired apps or remove app
To check if Teams Connex is currently allowed to access Microsoft Teams, go to the Microsoft Teams menu and select Settings…, then select Privacy in the settings window, then scroll all the way down on the right and click on Manage API. This should display an entry for Teams Connex under the Allowed apps and devices.
If you decided to remove Teams Connex and want to remove API access for the app, you can click on the arrow on the right and click Block. This action will move the Teams Connex entry to the list of Blocked apps and devices. From there you can again click the arrow on the right and click Forget to completely remove the entry from Microsoft Teams.
Home Assistant Entities
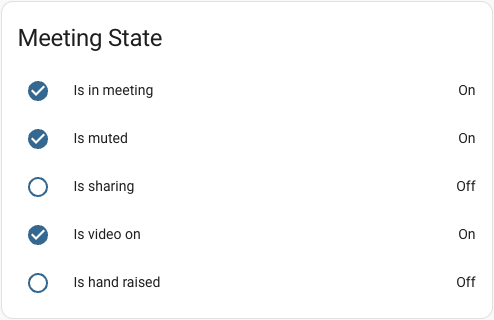
If everything has gone as planned you should now see several new entities in Home Assistant. They should all be be self-explanatory – however I noticed that “is background blurred” is still set to False even when using a background image, and the “has unread messages” has not yet been turned to True for me.
- Meeting State is background blurred
- Meeting State is hand raised
- Meeting State is in meeting
- Meeting State is muted
- Meeting State is recording on
- Meeting State is sharing
- Meeting State is video on
- Meeting State has unread messages
You can now start using the state of these binary sensors to create automations to for example remote control lighting in your office or maybe control a “busy” light for the housemates to know you are in a meeting.
The “can” sensors are currently for information only. The Microsoft Teams API allows sending actions to Teams, but this not currently implemented in Teams Connex.
- Meeting Permissions can leave
- Meeting Permissions can react
- Meeting Permissions can stop sharing
- Meeting Permissions can toggle blur
- Meeting Permissions can toggle chat
- Meeting Permissions can toggle hand
- Meeting Permissions can toggle mute
- Meeting Permissions can toggle share tray
- Meeting Permissions can toggle video
Troubleshooting
Logging
The application automatically logs messages to a file which you can find under your home folder: /Users/<username>/Library/Logs/Teams\ Connex/TeamsConnex.log
Alternatively you can access this log file via the Console application that comes with your macOS installation. In the Reports section in the left column click on Log Reports and find the file TeamsConnex.log in the list on the right to see messages logged by the Teams Connex app.
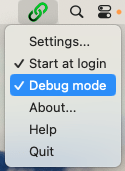
By default, the application logs messages up to INFO level. For trouble-shooting purposes you can change this to DEBUG level by selecting menu item Debug mode from the status bar menu of the Teams Connex app.